> ## Documentation Index
> Fetch the complete documentation index at: https://docs.operata.com/llms.txt
> Use this file to discover all available pages before exploring further.
# Install the Genesys Cloud integration
> Set up the OAuth client, Amazon EventBridge source, and Operata configuration to stream Genesys Cloud Conversations into Operata.
Connect your Genesys Cloud organization to Operata so that every Conversation streams into Operata — a test interaction you end cleanly appears in the Operata console within five minutes of conversation end.
This guide covers manual integration. Automatic integration is available
via [AppFoundry](https://appfoundry.genesys.com/filter/genesyscloud/listing/cf45f658-f4a8-4e78-aef7-5e0f97482a51).
## Before you start
* An [Operata account](/docs/get-started-overview) with Admin role and your Operata Group ID. The Group ID is the UUID immediately after the hostname in your Operata console URL — for example, on `https://app.operata.io/41ba528c-cef7-400f-ab08-cc5aba33527f` the Group ID is `41ba528c-cef7-400f-ab08-cc5aba33527f`. Contact [Operata Support](mailto:support@operata.com) if you cannot locate it.
* A Genesys Cloud organization with admin access to **Account Settings**, **User Management**, and **IT and Integrations**.
* The [Genesys Cloud integration overview](/docs/genesys-overview) read end to end — the OAuth scopes you grant in step 2 map to the data Operata reads.
## Steps
### 1. Capture the Organization ID
In the Genesys Cloud admin console, go to **Account > Organization Settings > Organization Details** and copy the **Organization ID**. Operata configures Amazon EventBridge and Secrets Manager against this ID.
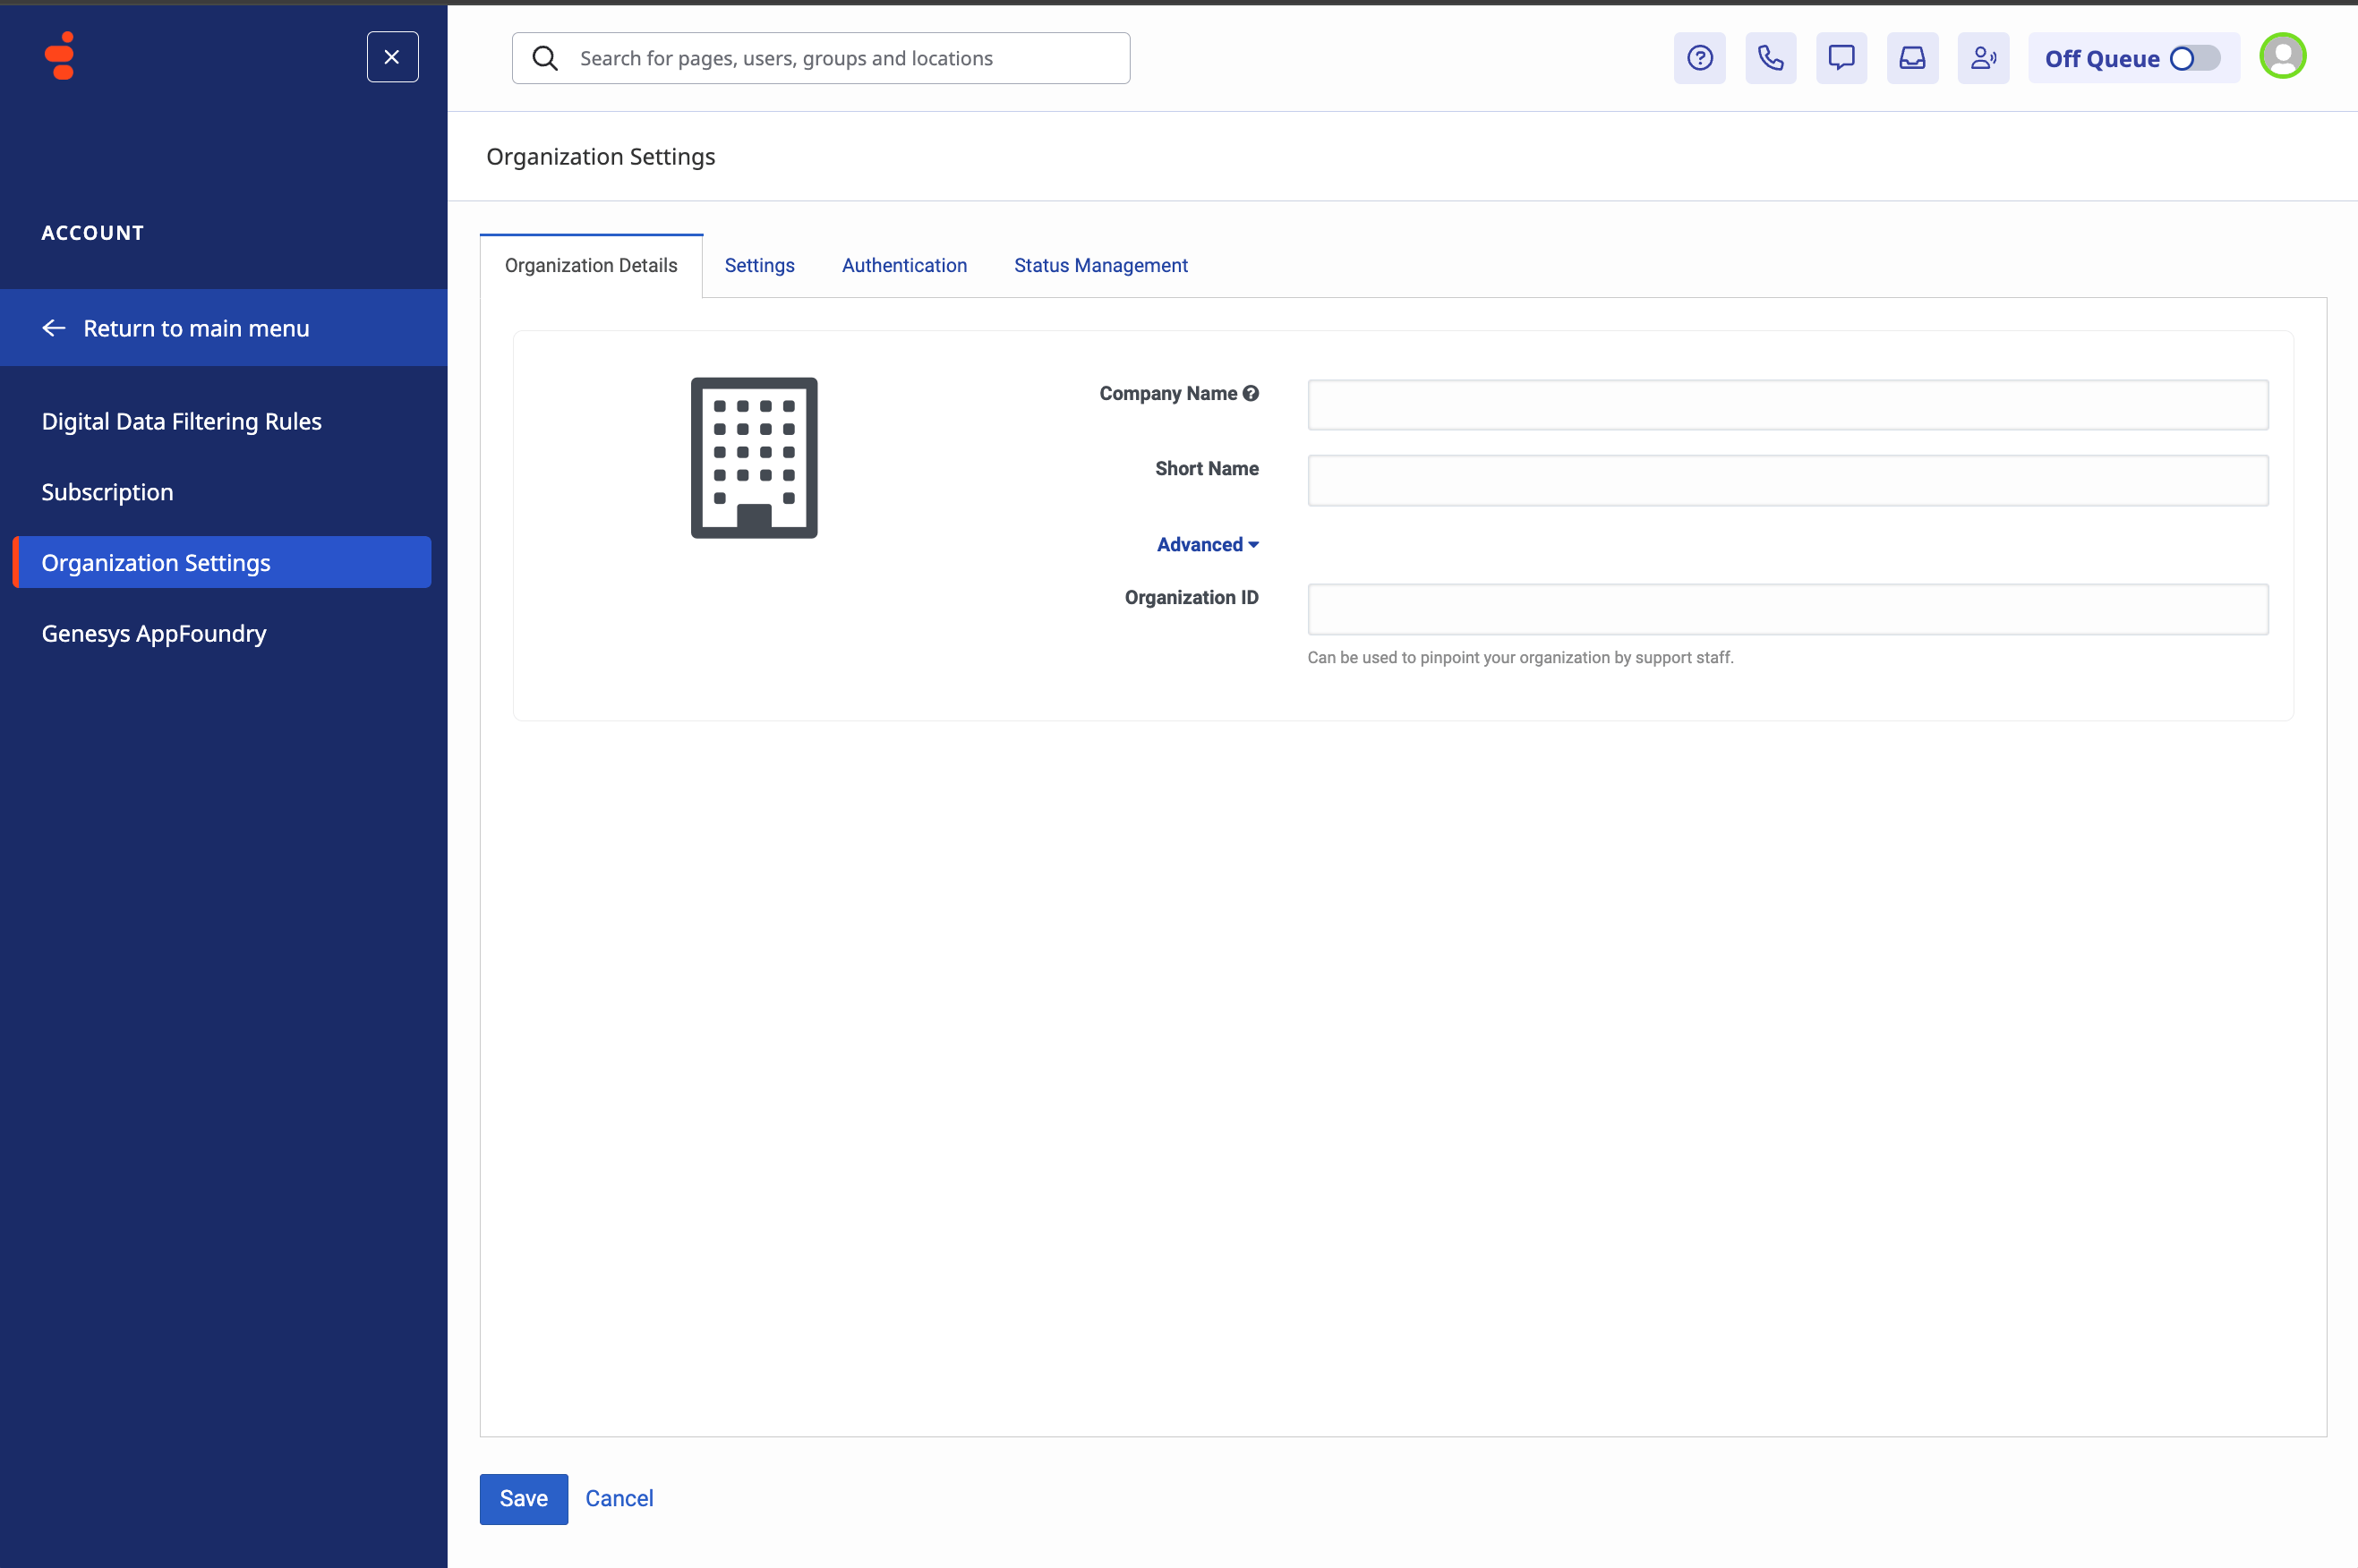 Save the Organization ID alongside your Operata Group ID. You need both in step 4.
### 2. Create the OAuth client
Genesys Cloud uses role-based access control. Create an access role with the permissions Operata needs, then assign that role to an OAuth client.
**Create the access role:**
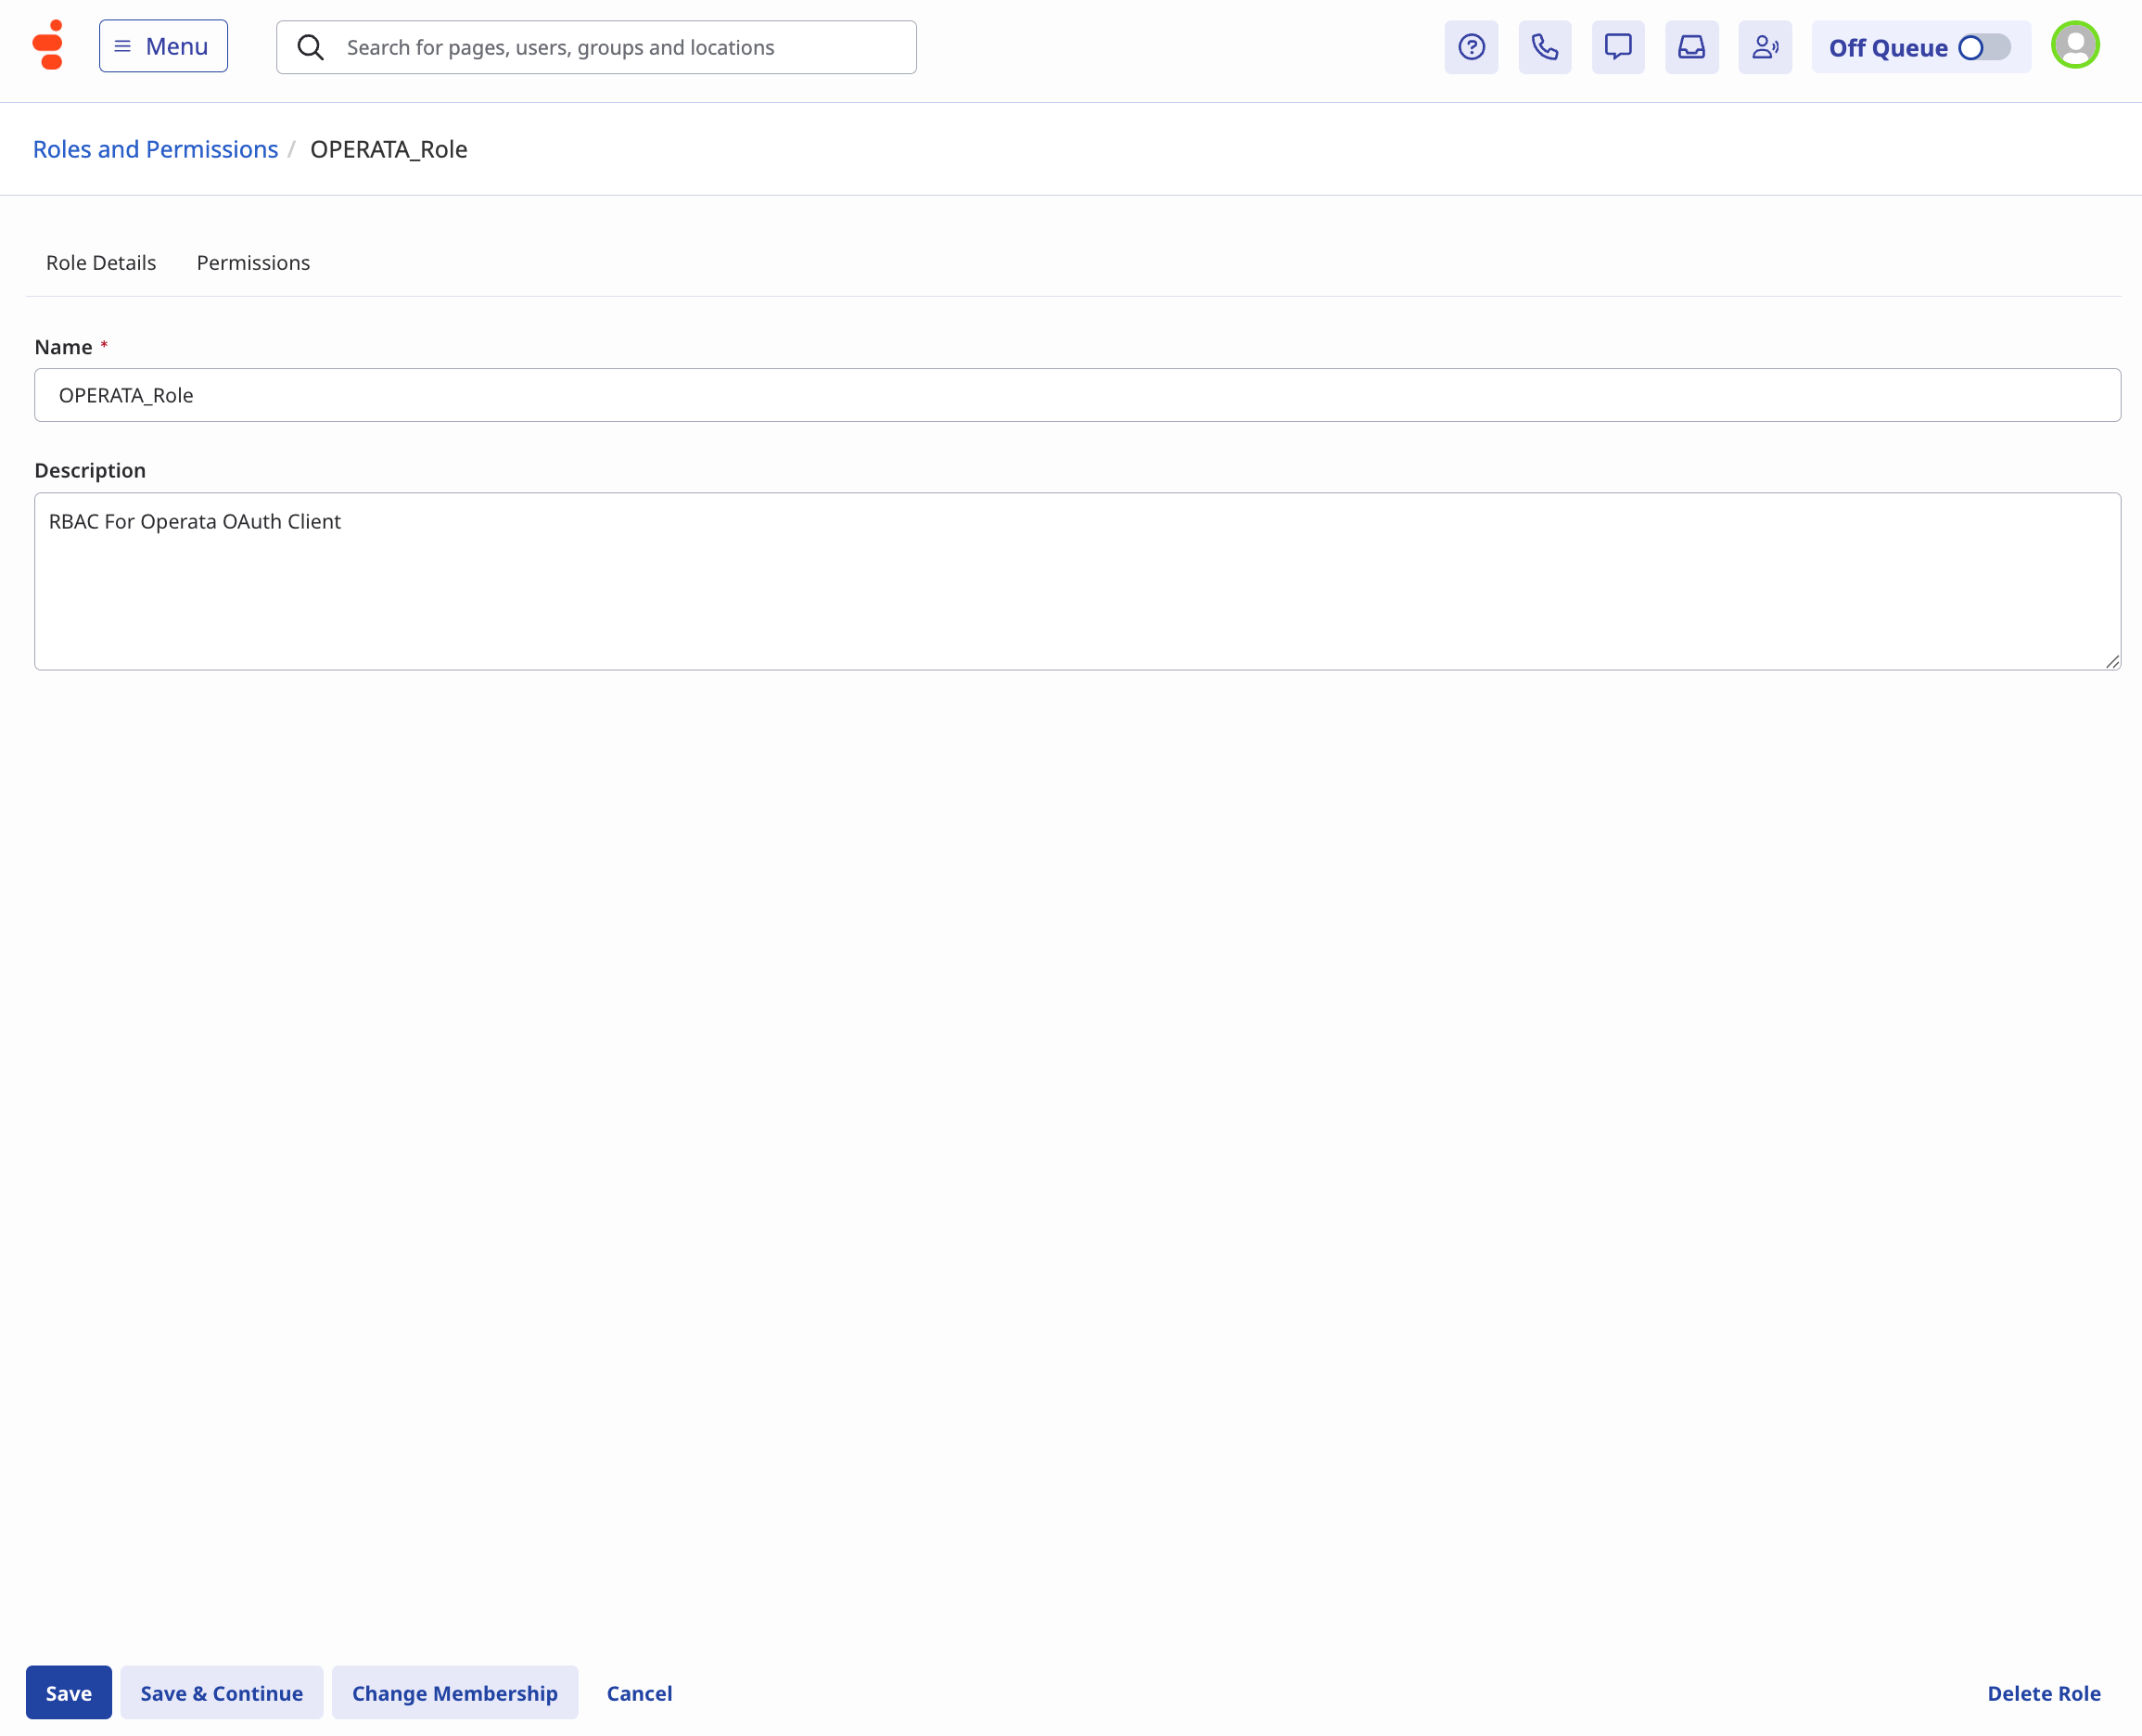
In the Genesys Cloud admin console, go to **User Management > Roles and Permissions > Add Role**. On the **Roles** tab, enter:
* **Name:** `OPERATA_Role`
* **Description:** `RBAC for Operata OAuth Client`
Save the Organization ID alongside your Operata Group ID. You need both in step 4.
### 2. Create the OAuth client
Genesys Cloud uses role-based access control. Create an access role with the permissions Operata needs, then assign that role to an OAuth client.
**Create the access role:**
In the Genesys Cloud admin console, go to **User Management > Roles and Permissions > Add Role**. On the **Roles** tab, enter:
* **Name:** `OPERATA_Role`
* **Description:** `RBAC for Operata OAuth Client`
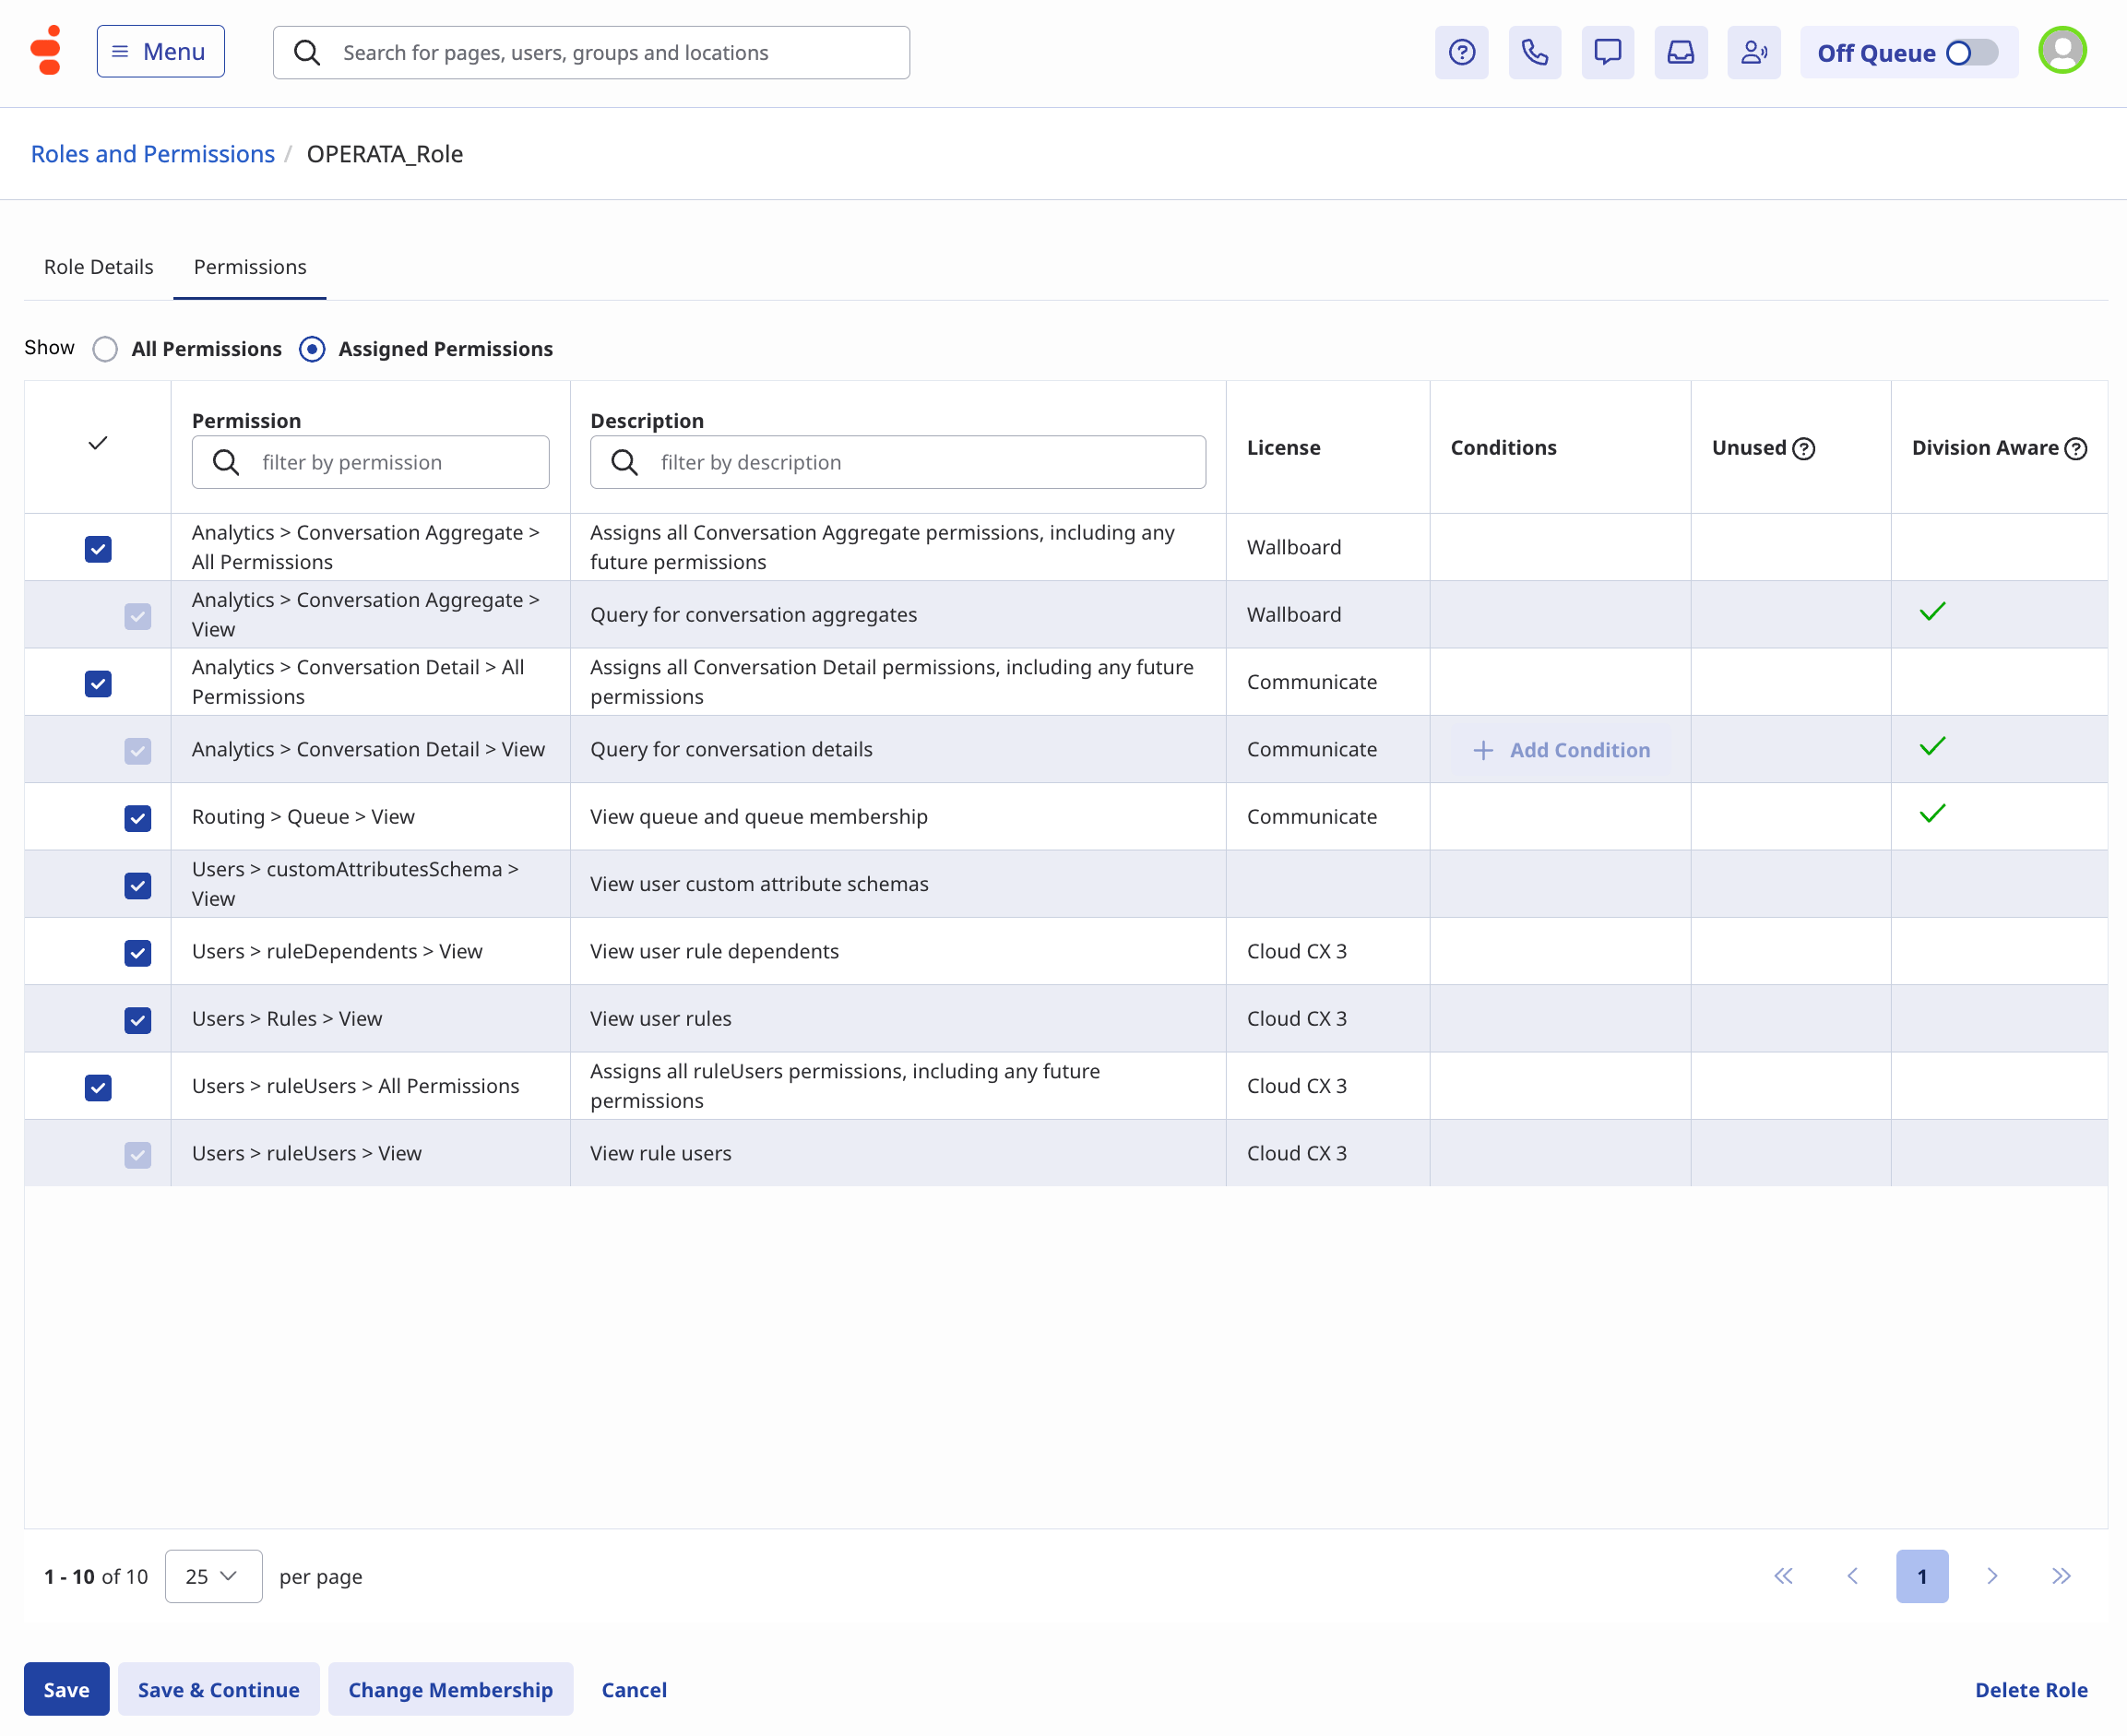
 Switch to the **Permissions** tab. Search for and select:
* Analytics > Conversation Aggregate > View
* Analytics > Conversation Detail > View
* Routing > Queue > View
* Users > customAttributesSchema > View
* Users > ruleDependents > View
* Users > Rules > View
* Users > ruleUsers > View
Switch to the **Permissions** tab. Search for and select:
* Analytics > Conversation Aggregate > View
* Analytics > Conversation Detail > View
* Routing > Queue > View
* Users > customAttributesSchema > View
* Users > ruleDependents > View
* Users > Rules > View
* Users > ruleUsers > View
 Click **Save**.
**Create the OAuth client:**
Navigate to **IT and Integrations > OAuth > Add Client**. Enter:
* **App Name:** `OPERATA_OAuth Client`
* **Description:** `Generated Client that's passed to the App Backend`
* **Grant Types:** Client Credentials
Click **Save**.
**Create the OAuth client:**
Navigate to **IT and Integrations > OAuth > Add Client**. Enter:
* **App Name:** `OPERATA_OAuth Client`
* **Description:** `Generated Client that's passed to the App Backend`
* **Grant Types:** Client Credentials
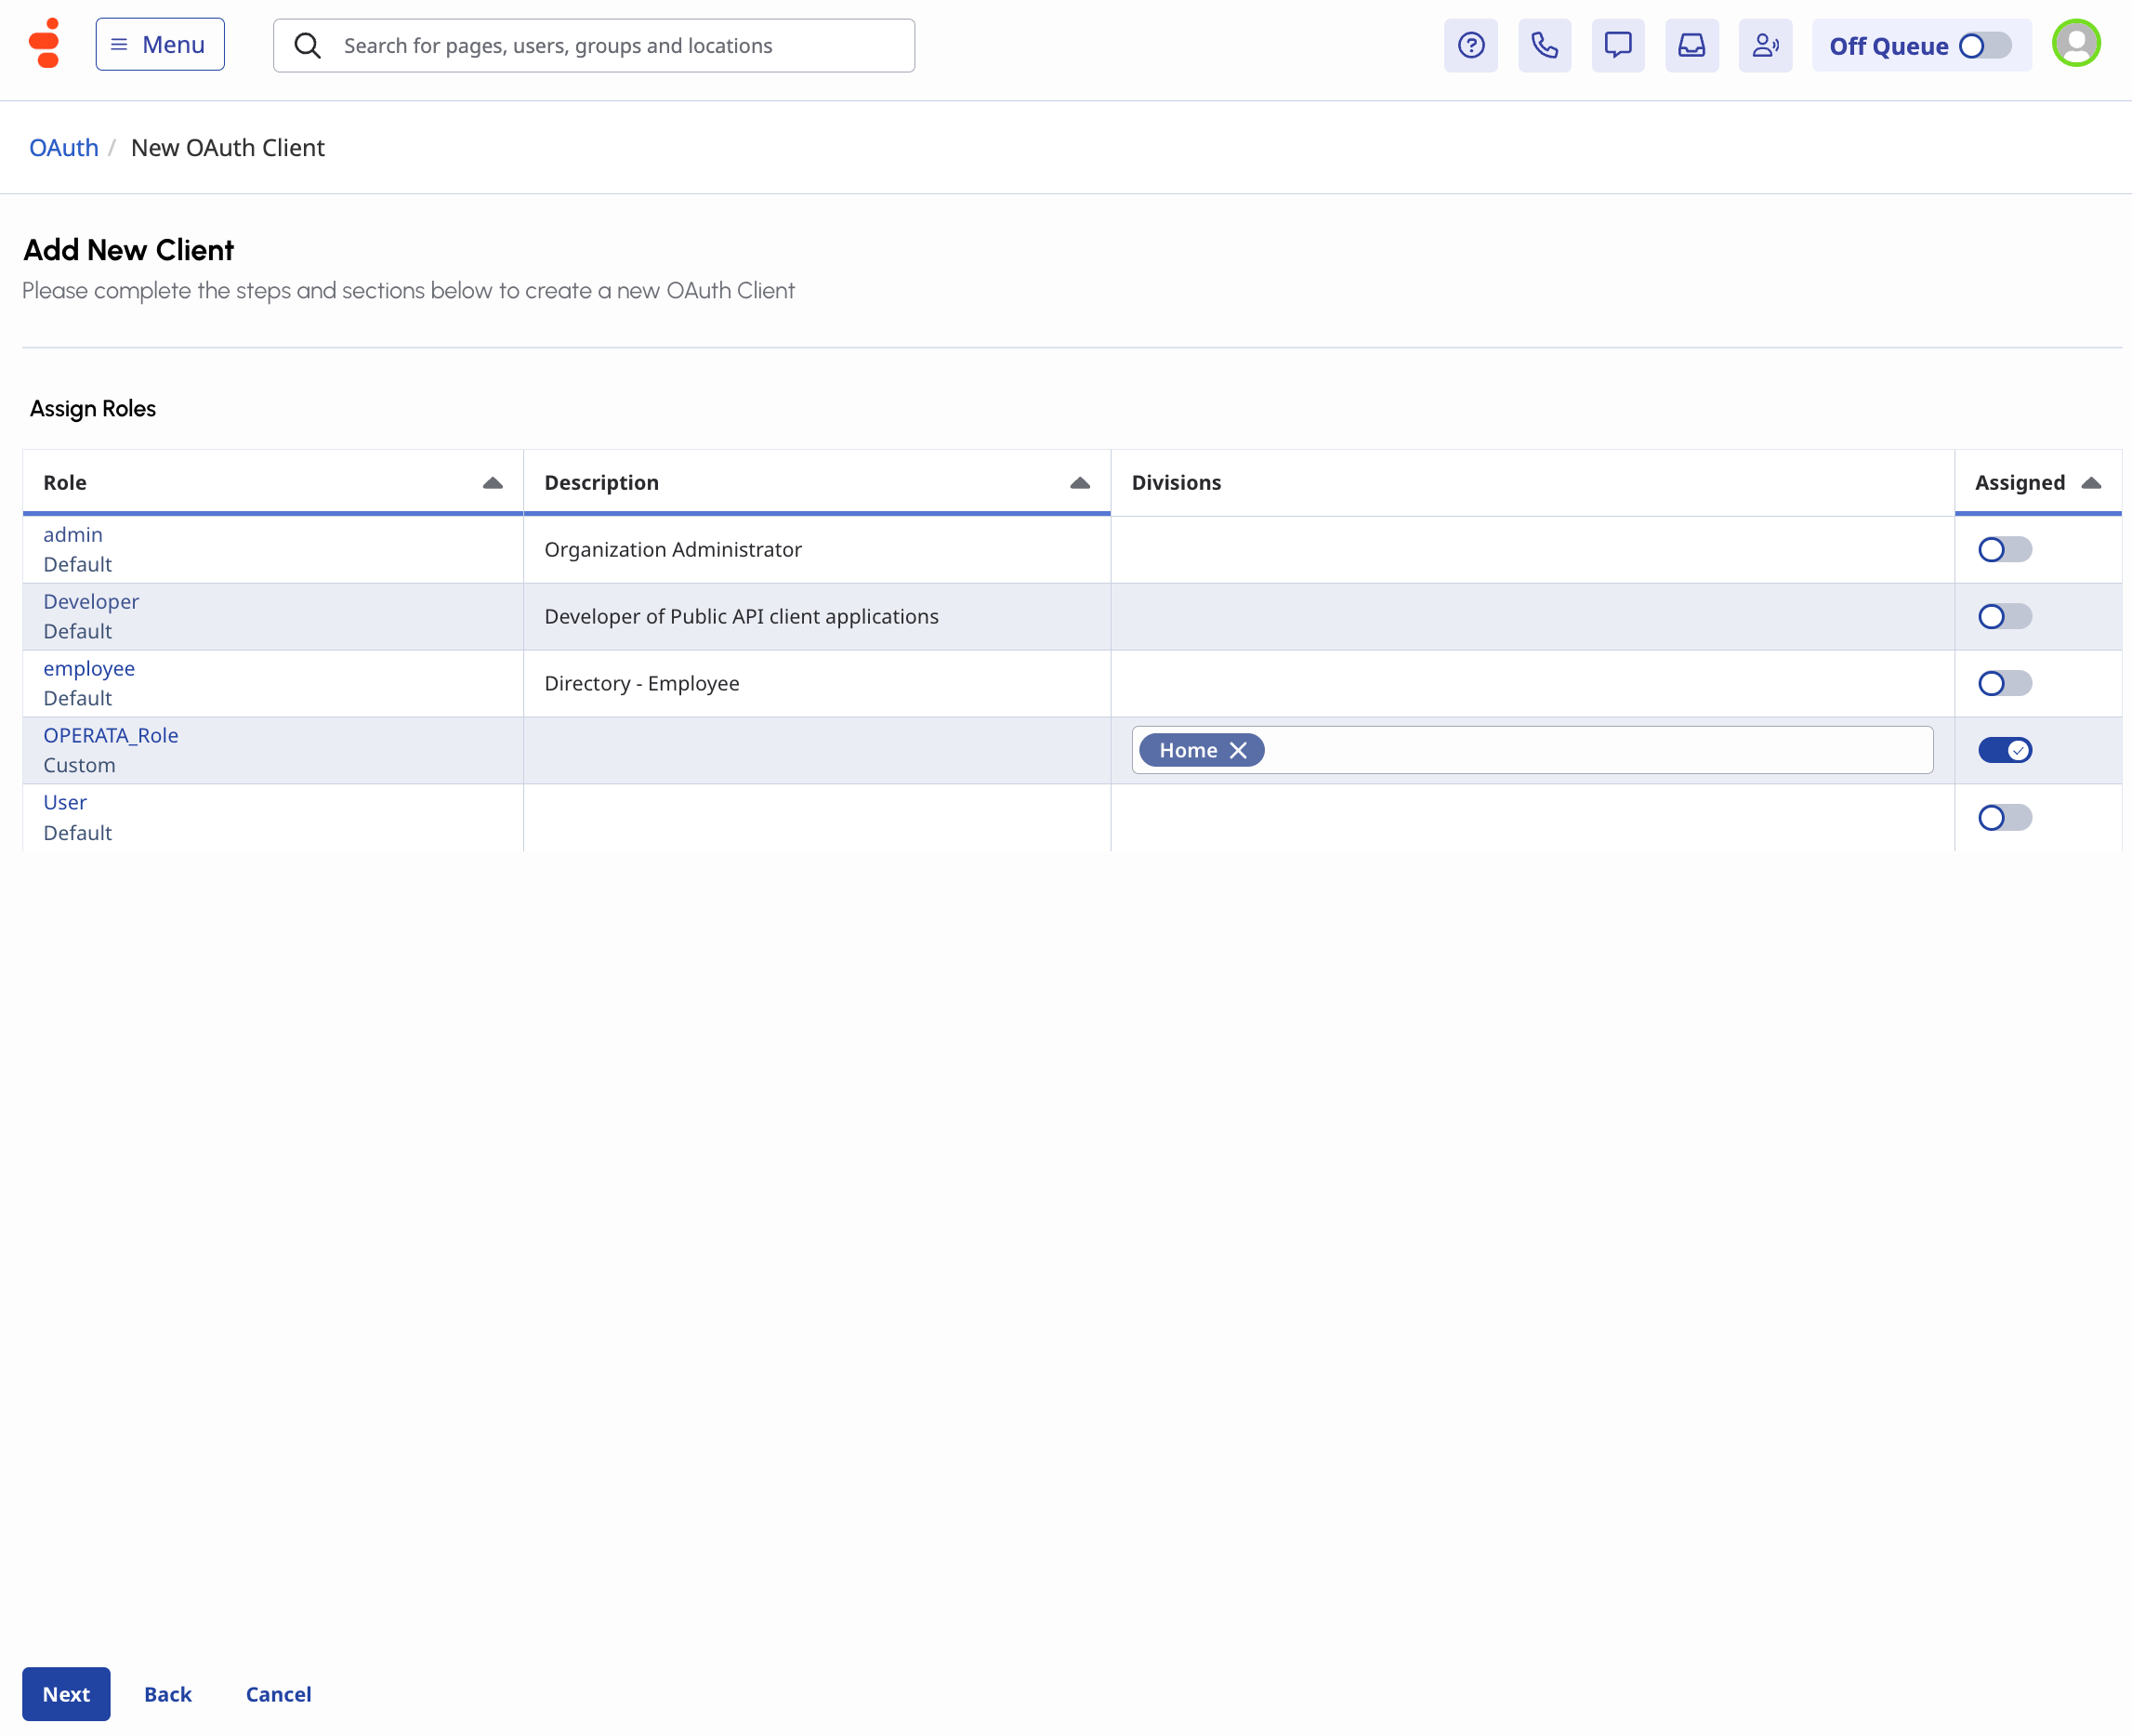
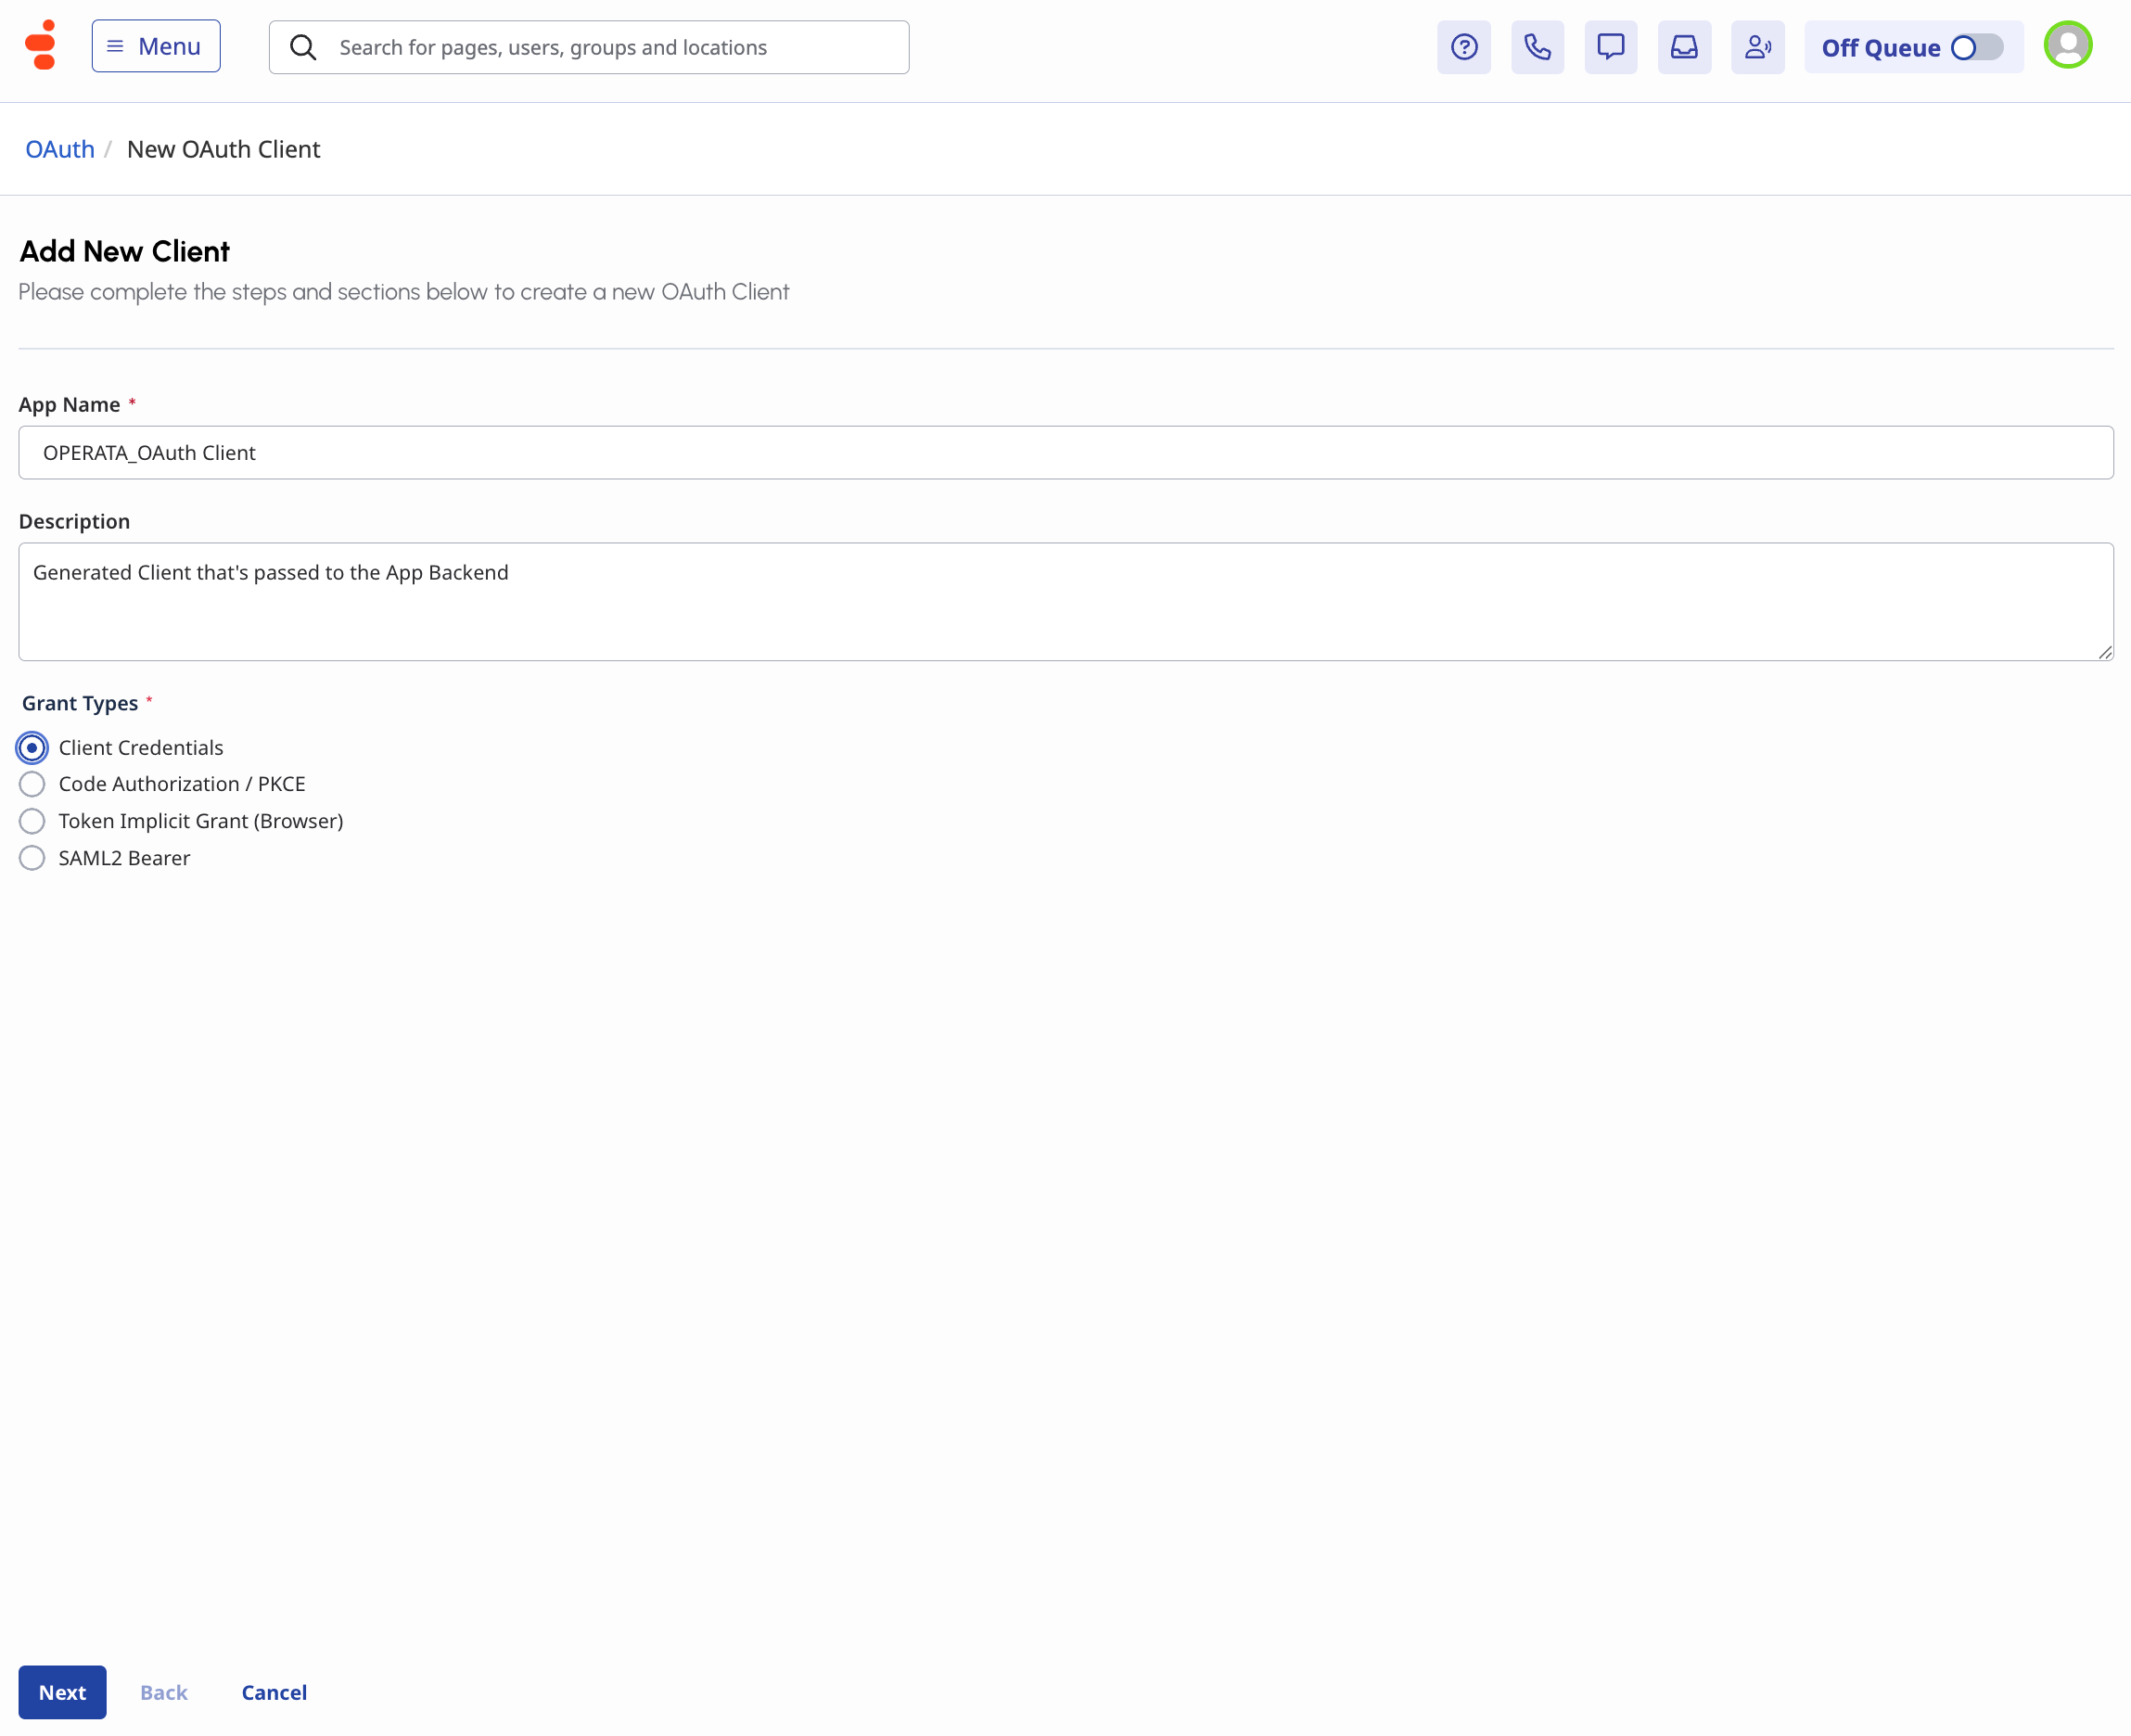 Click **Next**. On the role-assignment screen, toggle the **Assigned** column for the `OPERATA_Role` you created above and click **Next**.
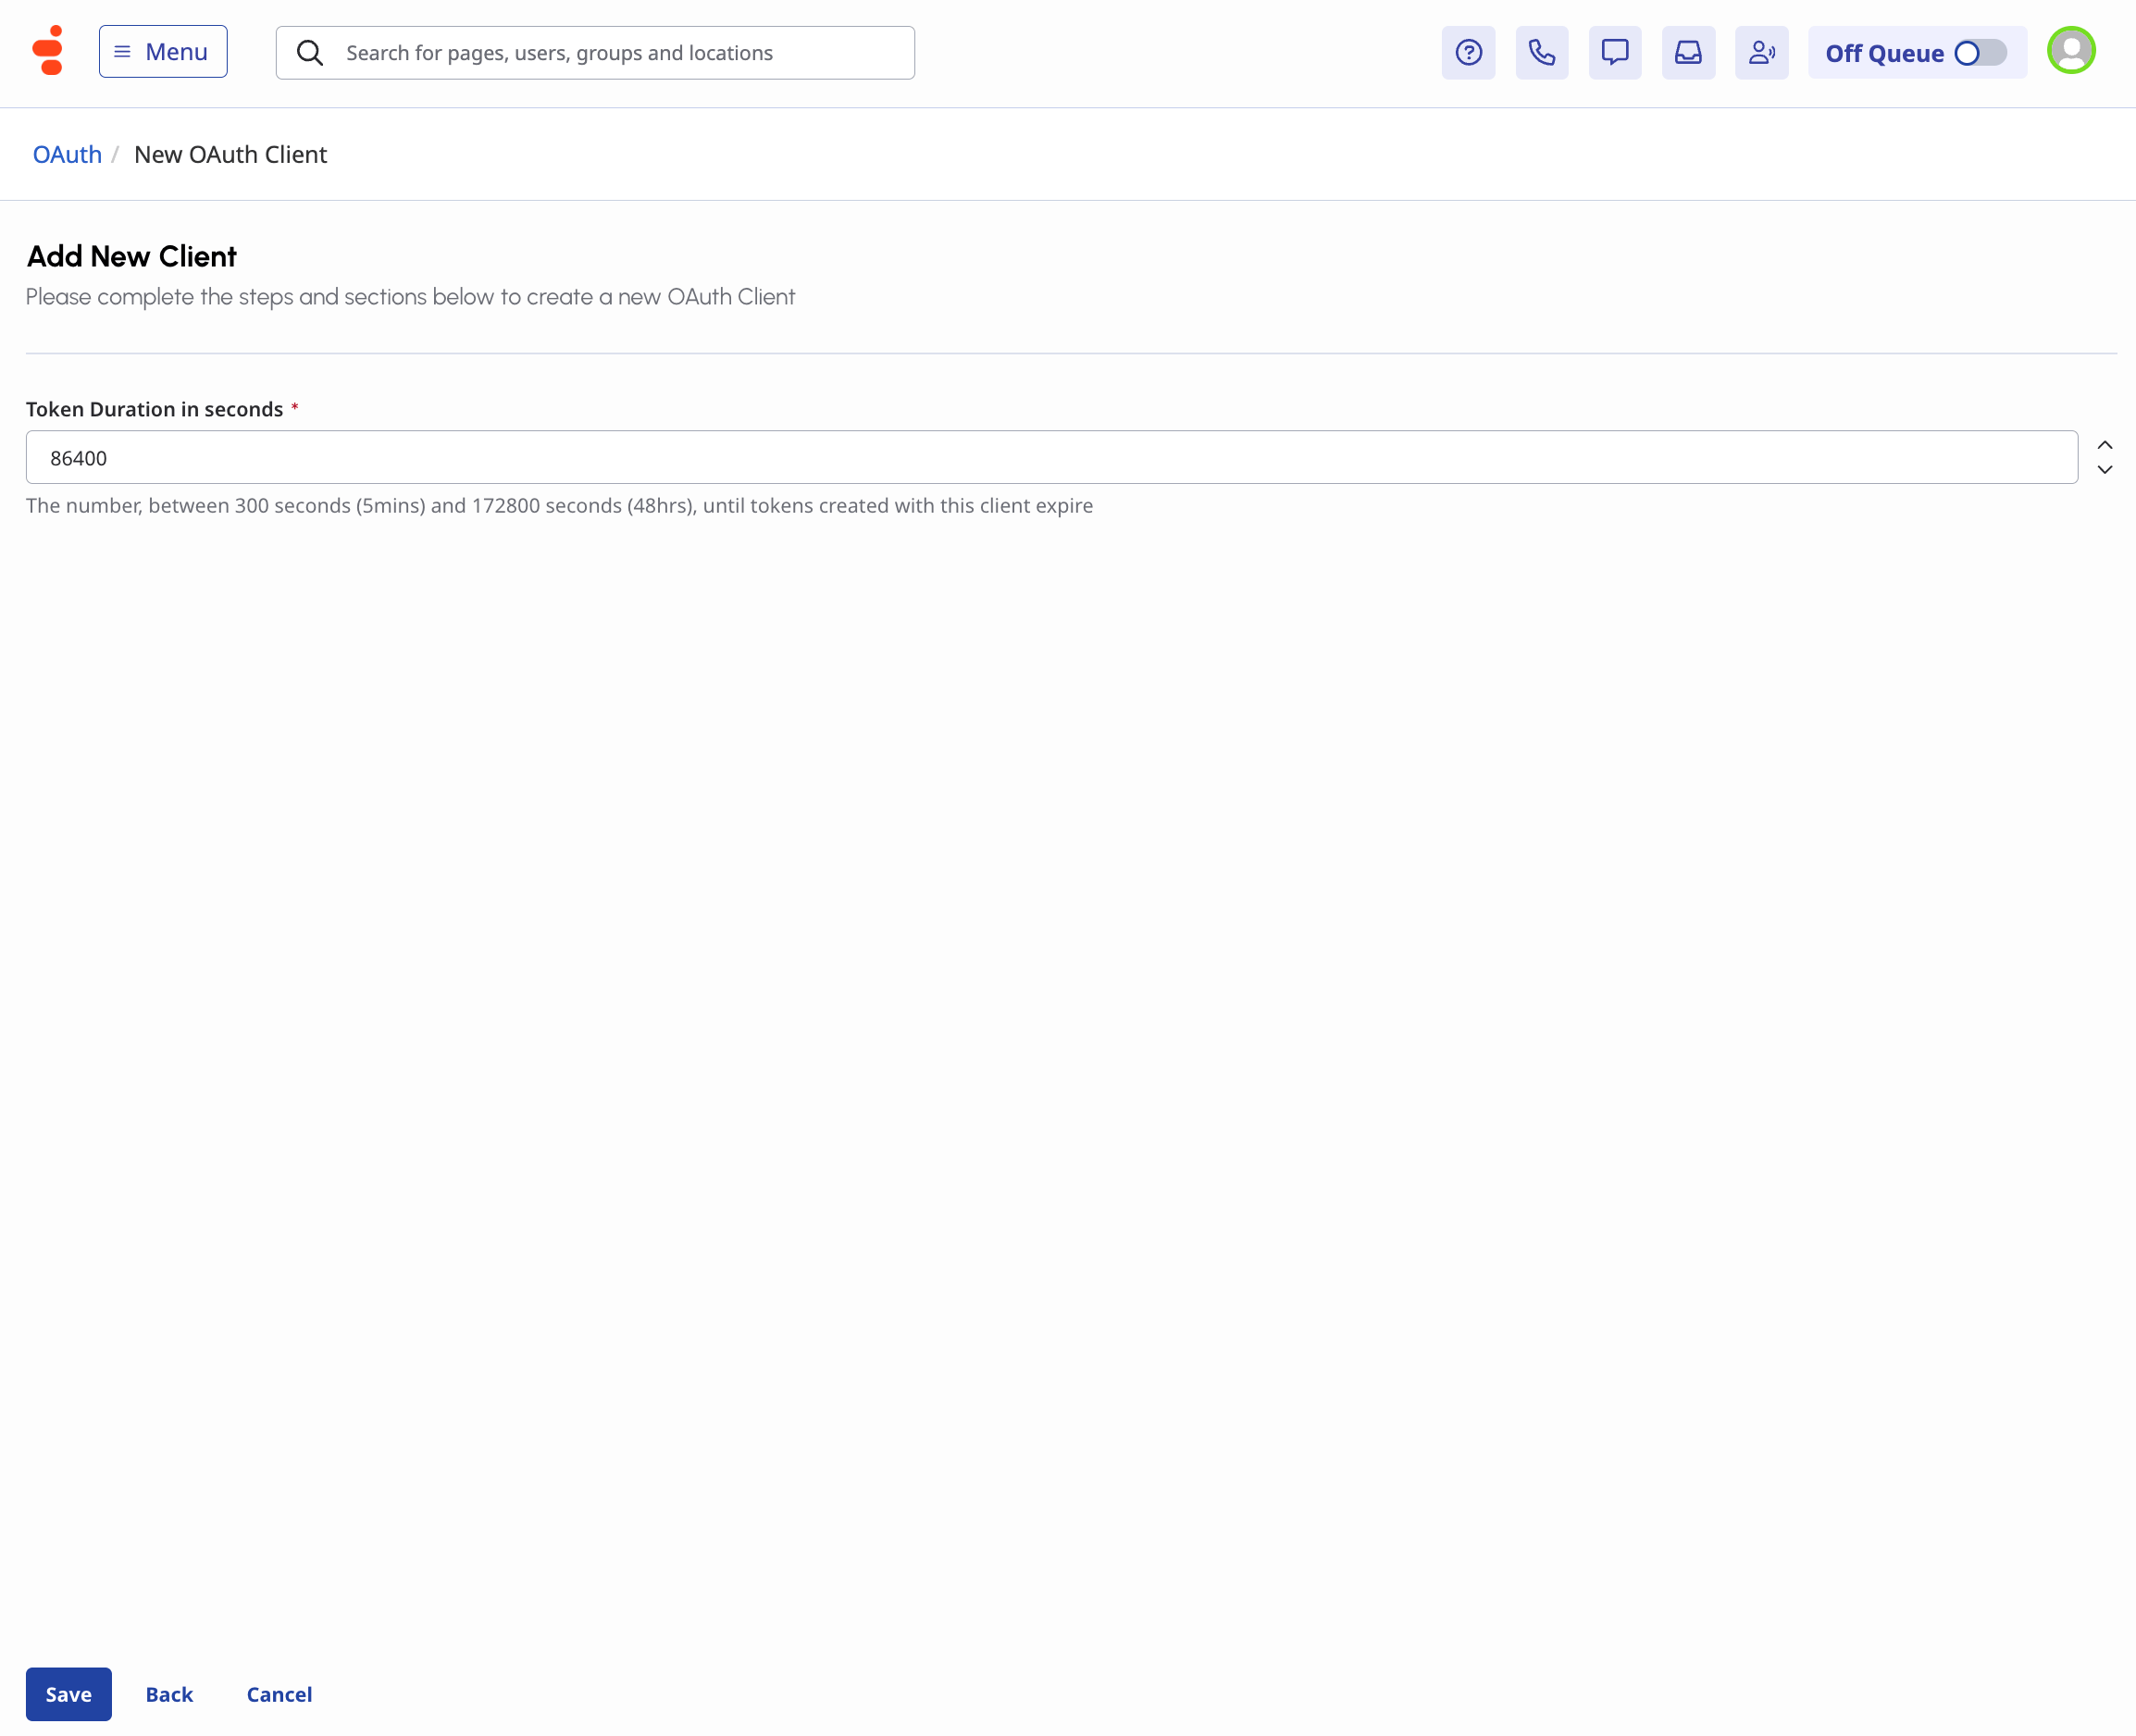
 Leave the default token duration of `86400` seconds (24 hours) and click **Save**.
 Genesys Cloud now displays the **Client ID** and **Client Secret**.
Genesys Cloud displays the Client Secret exactly once. Copy both values into a secure location before clicking **Finish**. Operata needs the Client ID and Client Secret in step 4; you cannot retrieve the secret afterwards.
Genesys Cloud now displays the **Client ID** and **Client Secret**.
Genesys Cloud displays the Client Secret exactly once. Copy both values into a secure location before clicking **Finish**. Operata needs the Client ID and Client Secret in step 4; you cannot retrieve the secret afterwards.
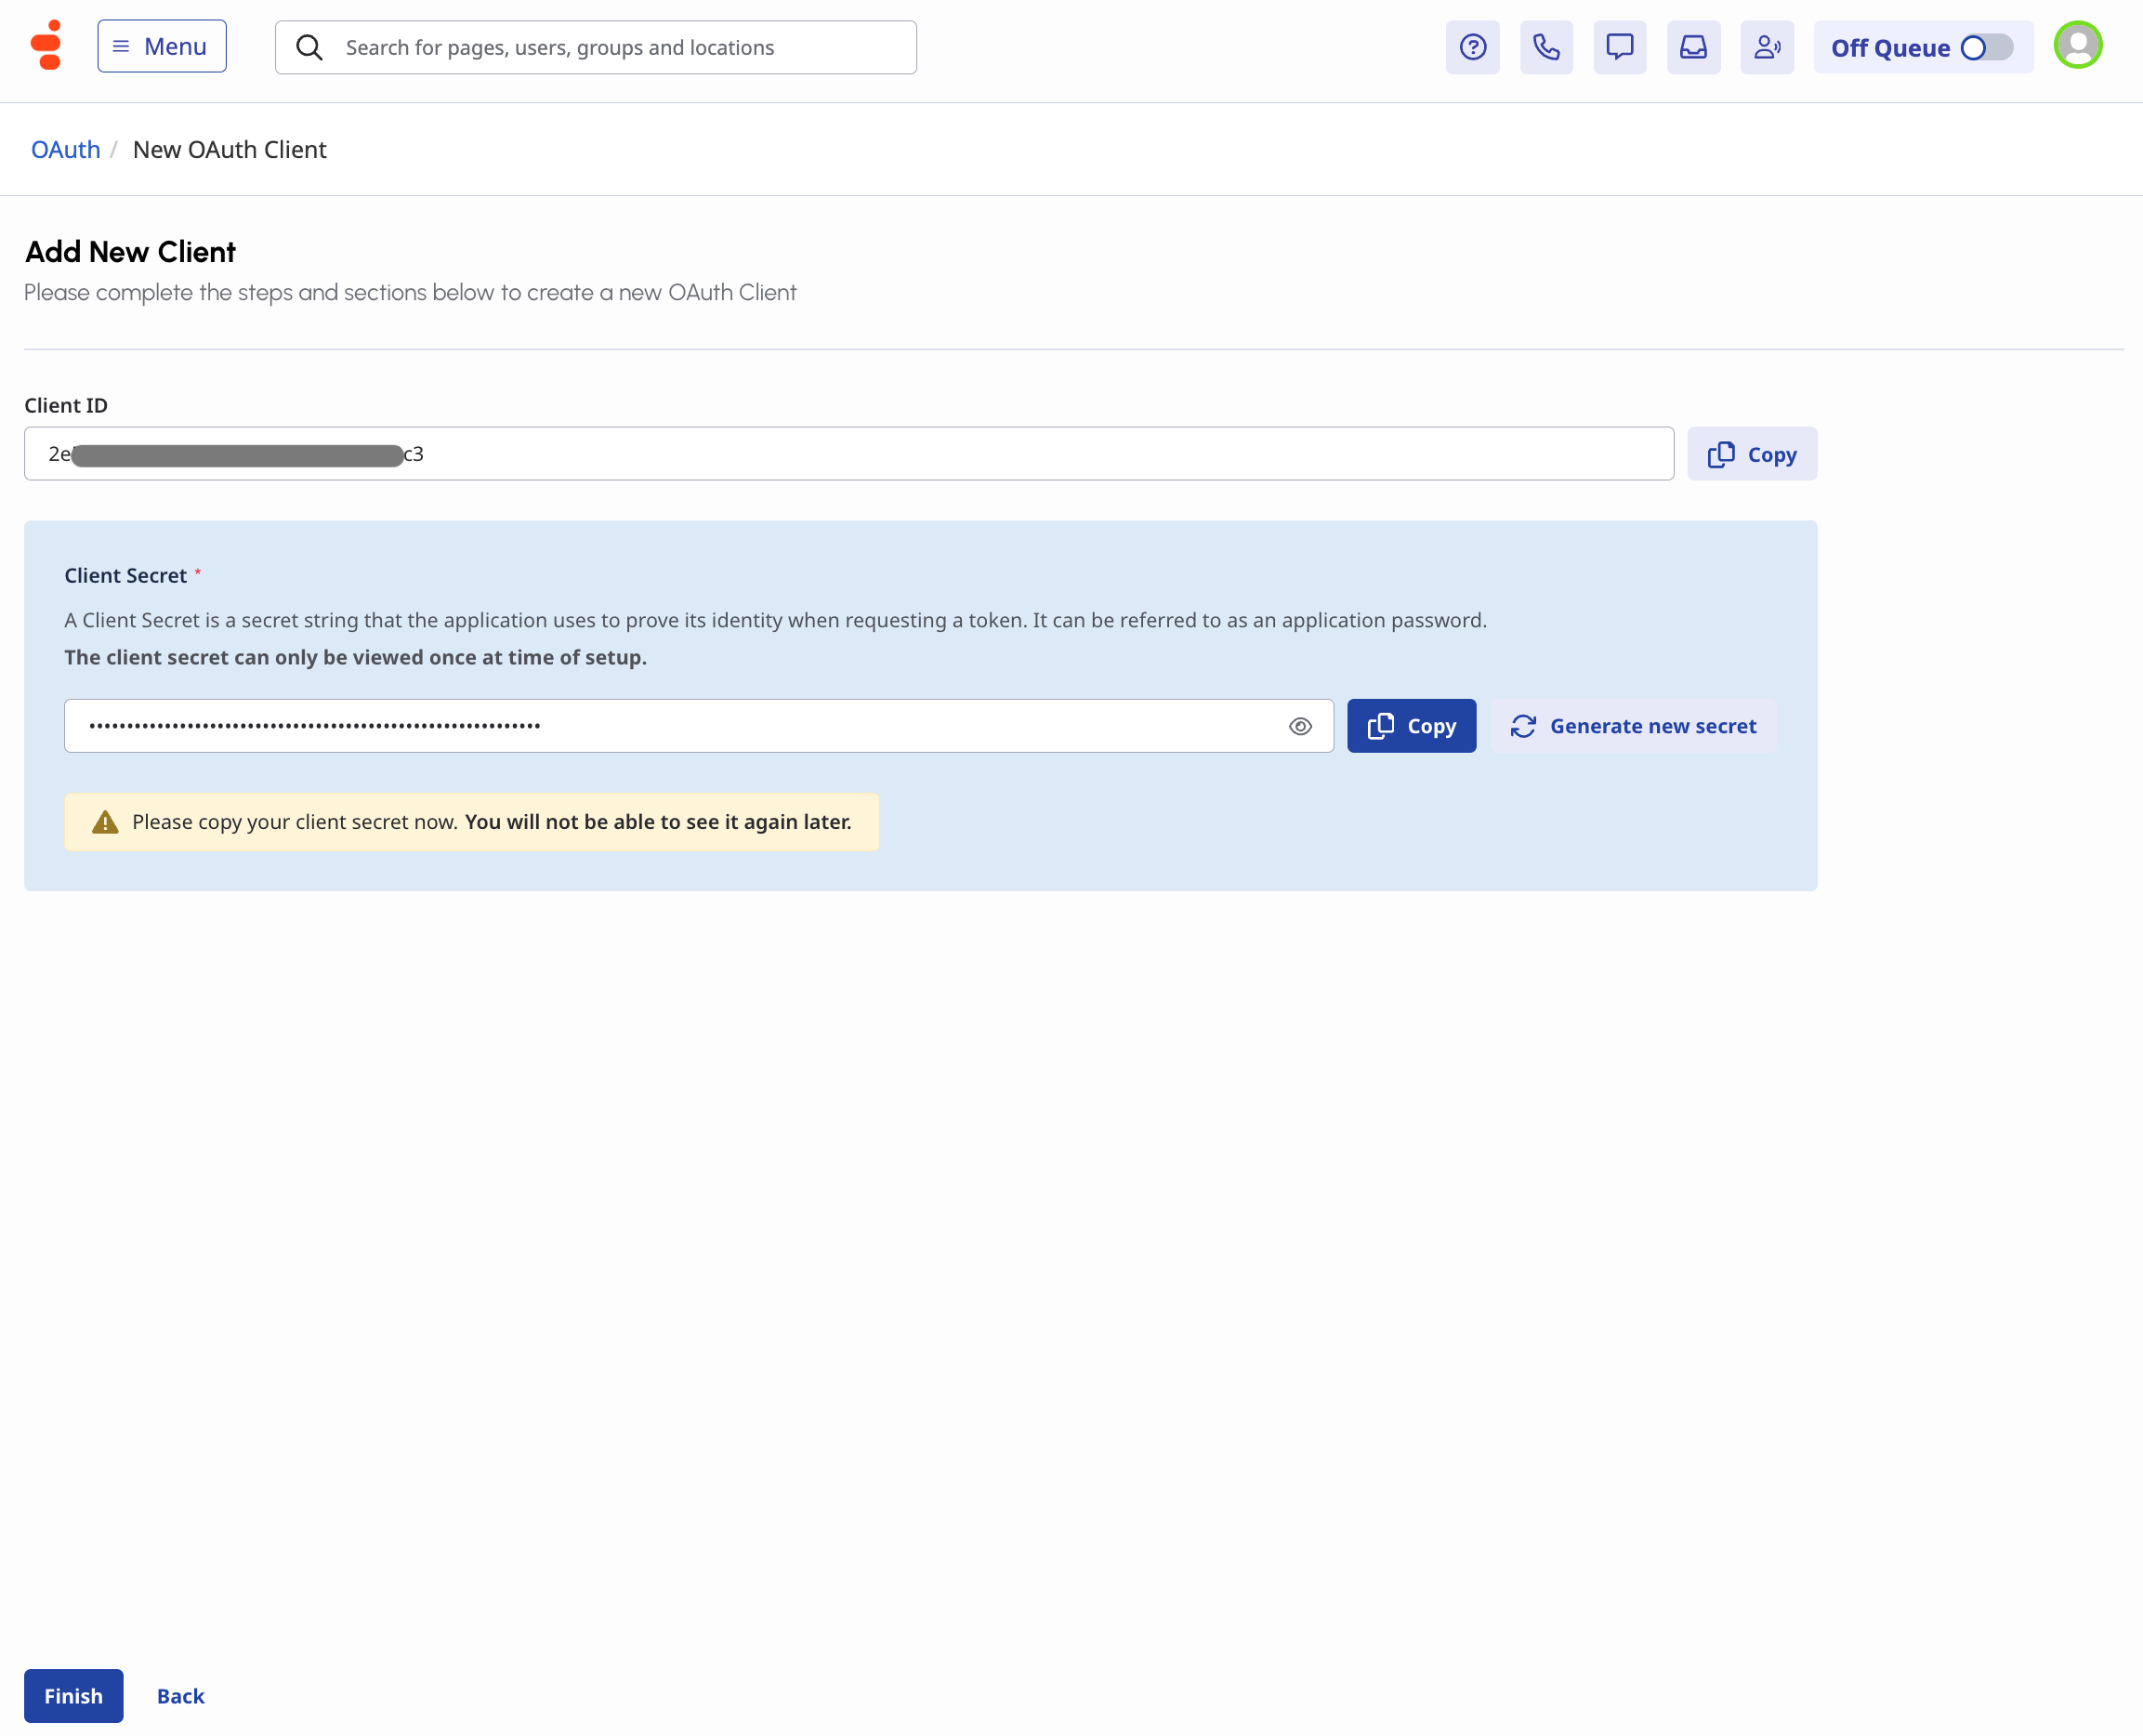 Click **Finish** once both values are saved.
### 3. Configure the Amazon EventBridge source
Operata reads Genesys Cloud events from Amazon EventBridge. Each Operata group supports exactly one Genesys Cloud Amazon EventBridge integration; if you already have one set up, skip to step 4.
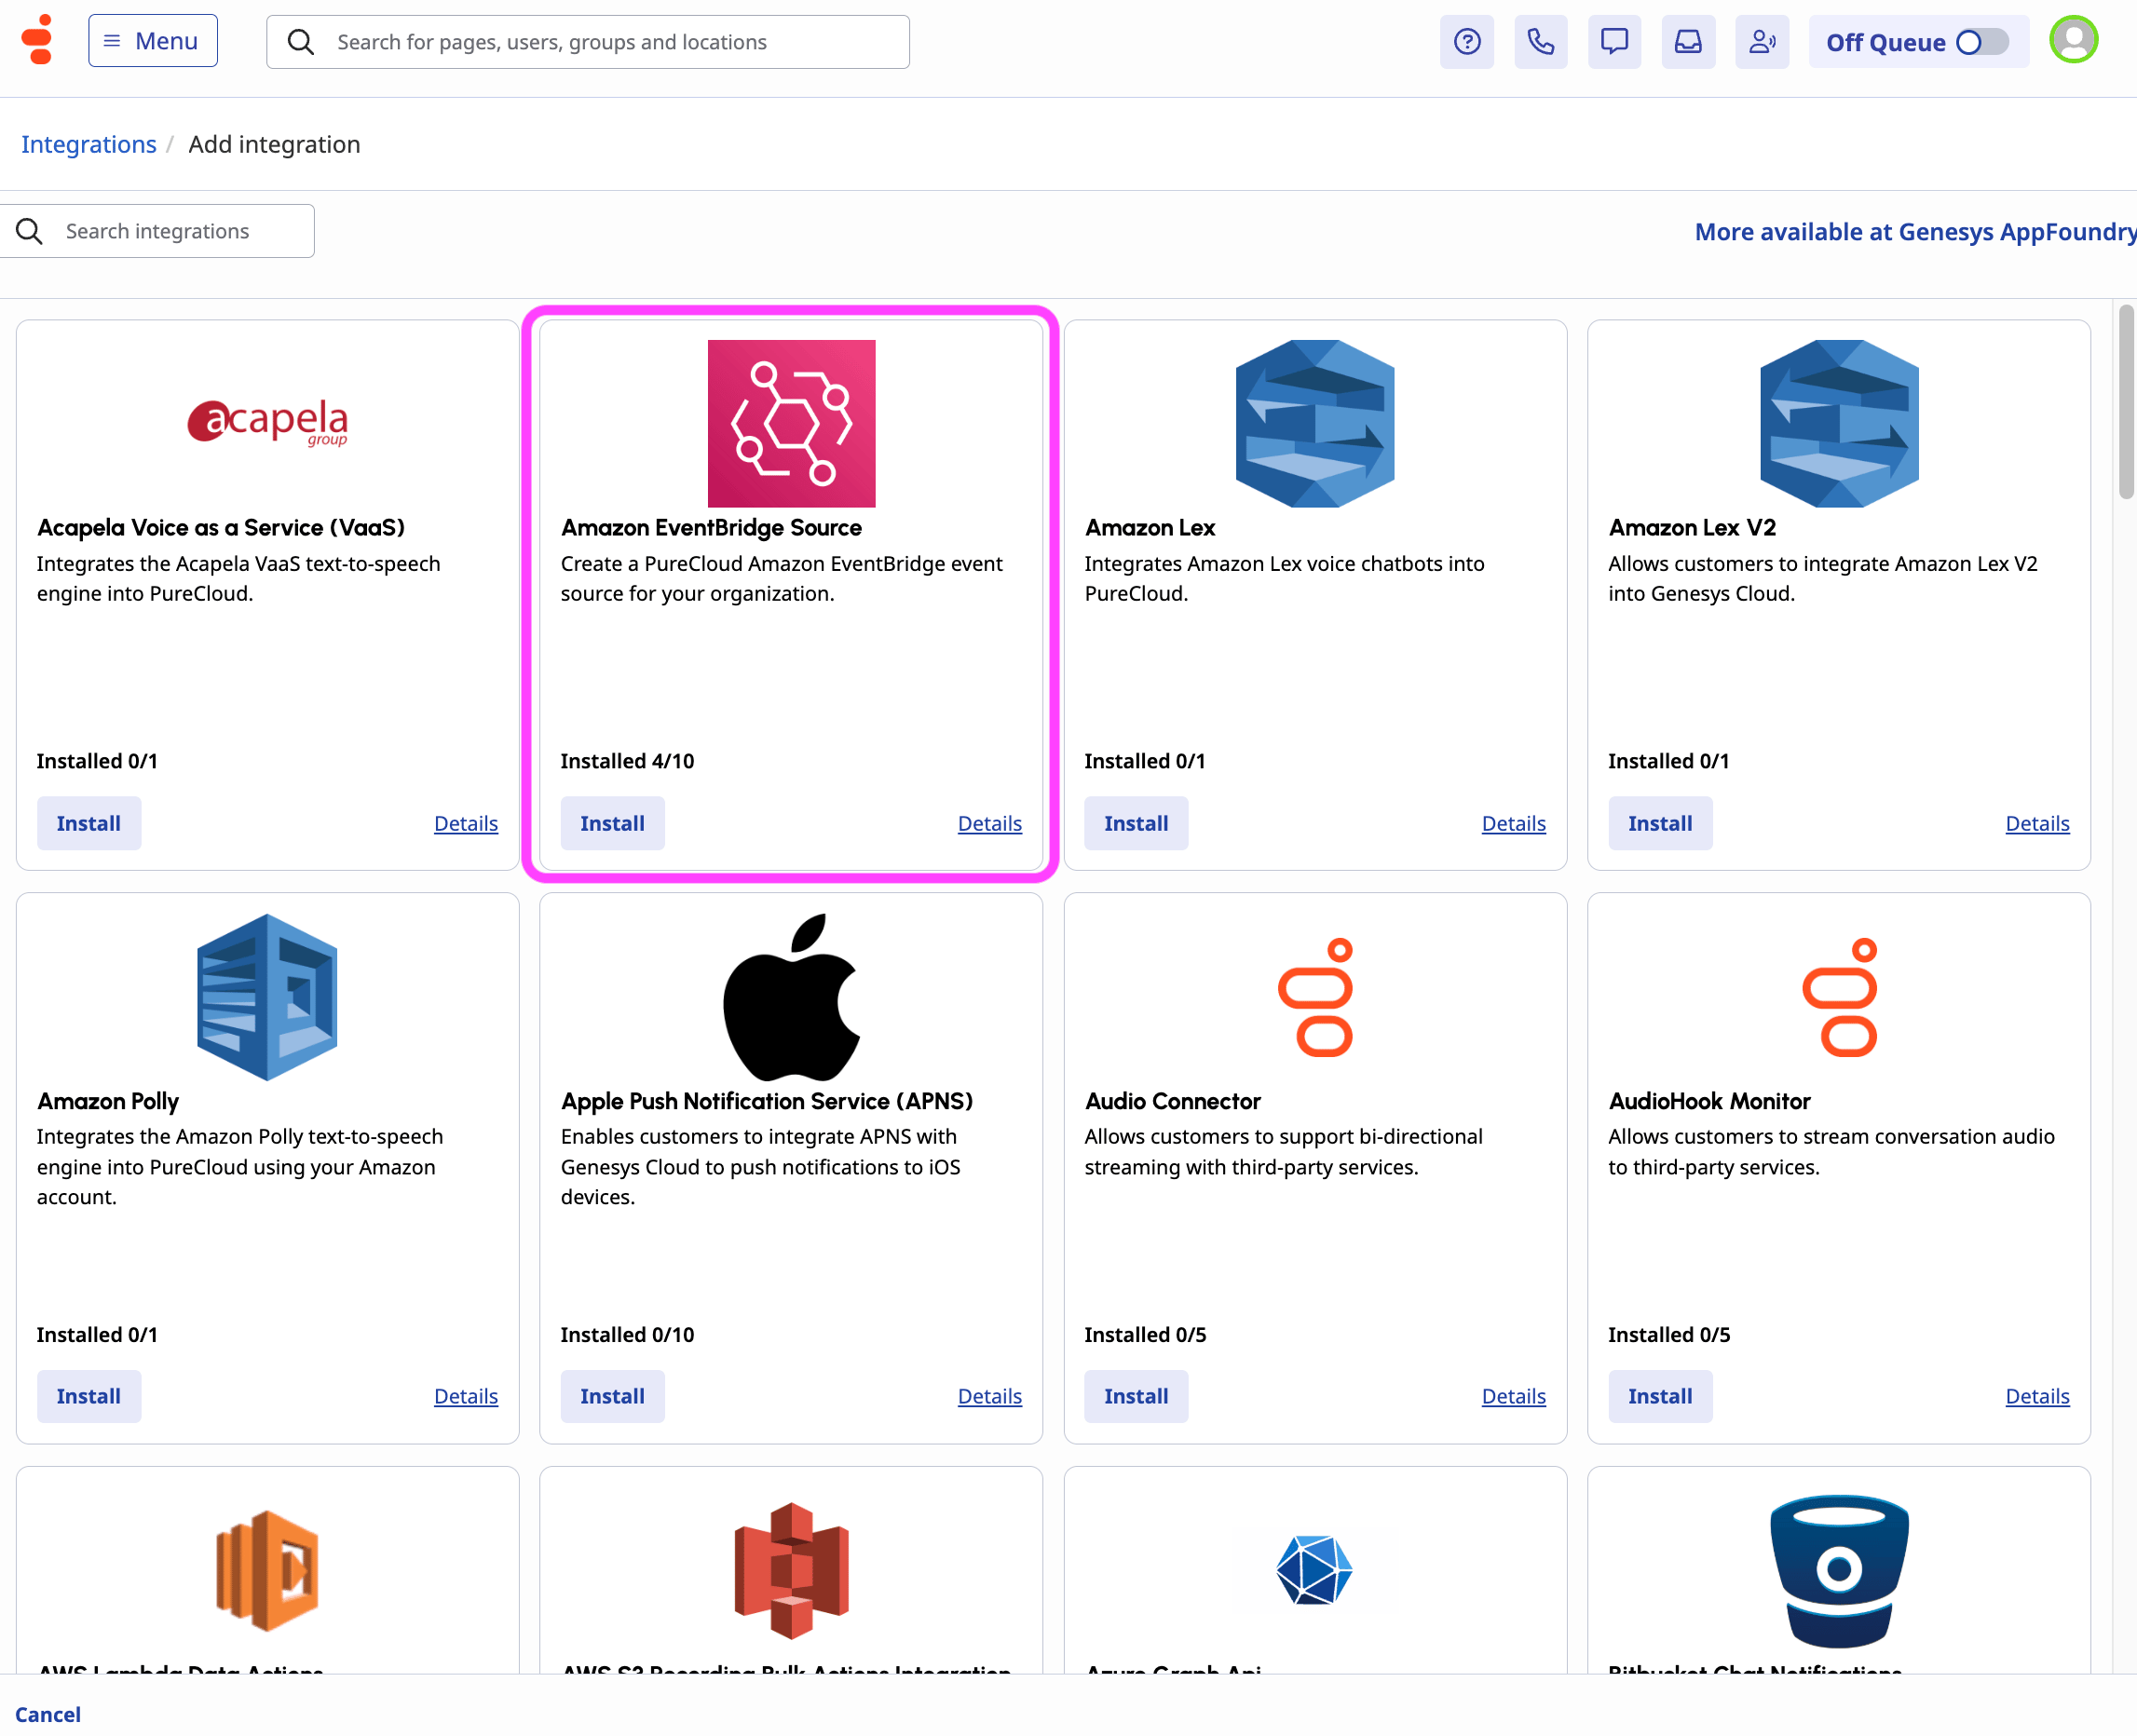
Navigate to **IT and Integrations > Integrations > Add Integration**. Click **Install** on the **Amazon EventBridge** Source tile.
Click **Finish** once both values are saved.
### 3. Configure the Amazon EventBridge source
Operata reads Genesys Cloud events from Amazon EventBridge. Each Operata group supports exactly one Genesys Cloud Amazon EventBridge integration; if you already have one set up, skip to step 4.
Navigate to **IT and Integrations > Integrations > Add Integration**. Click **Install** on the **Amazon EventBridge** Source tile.
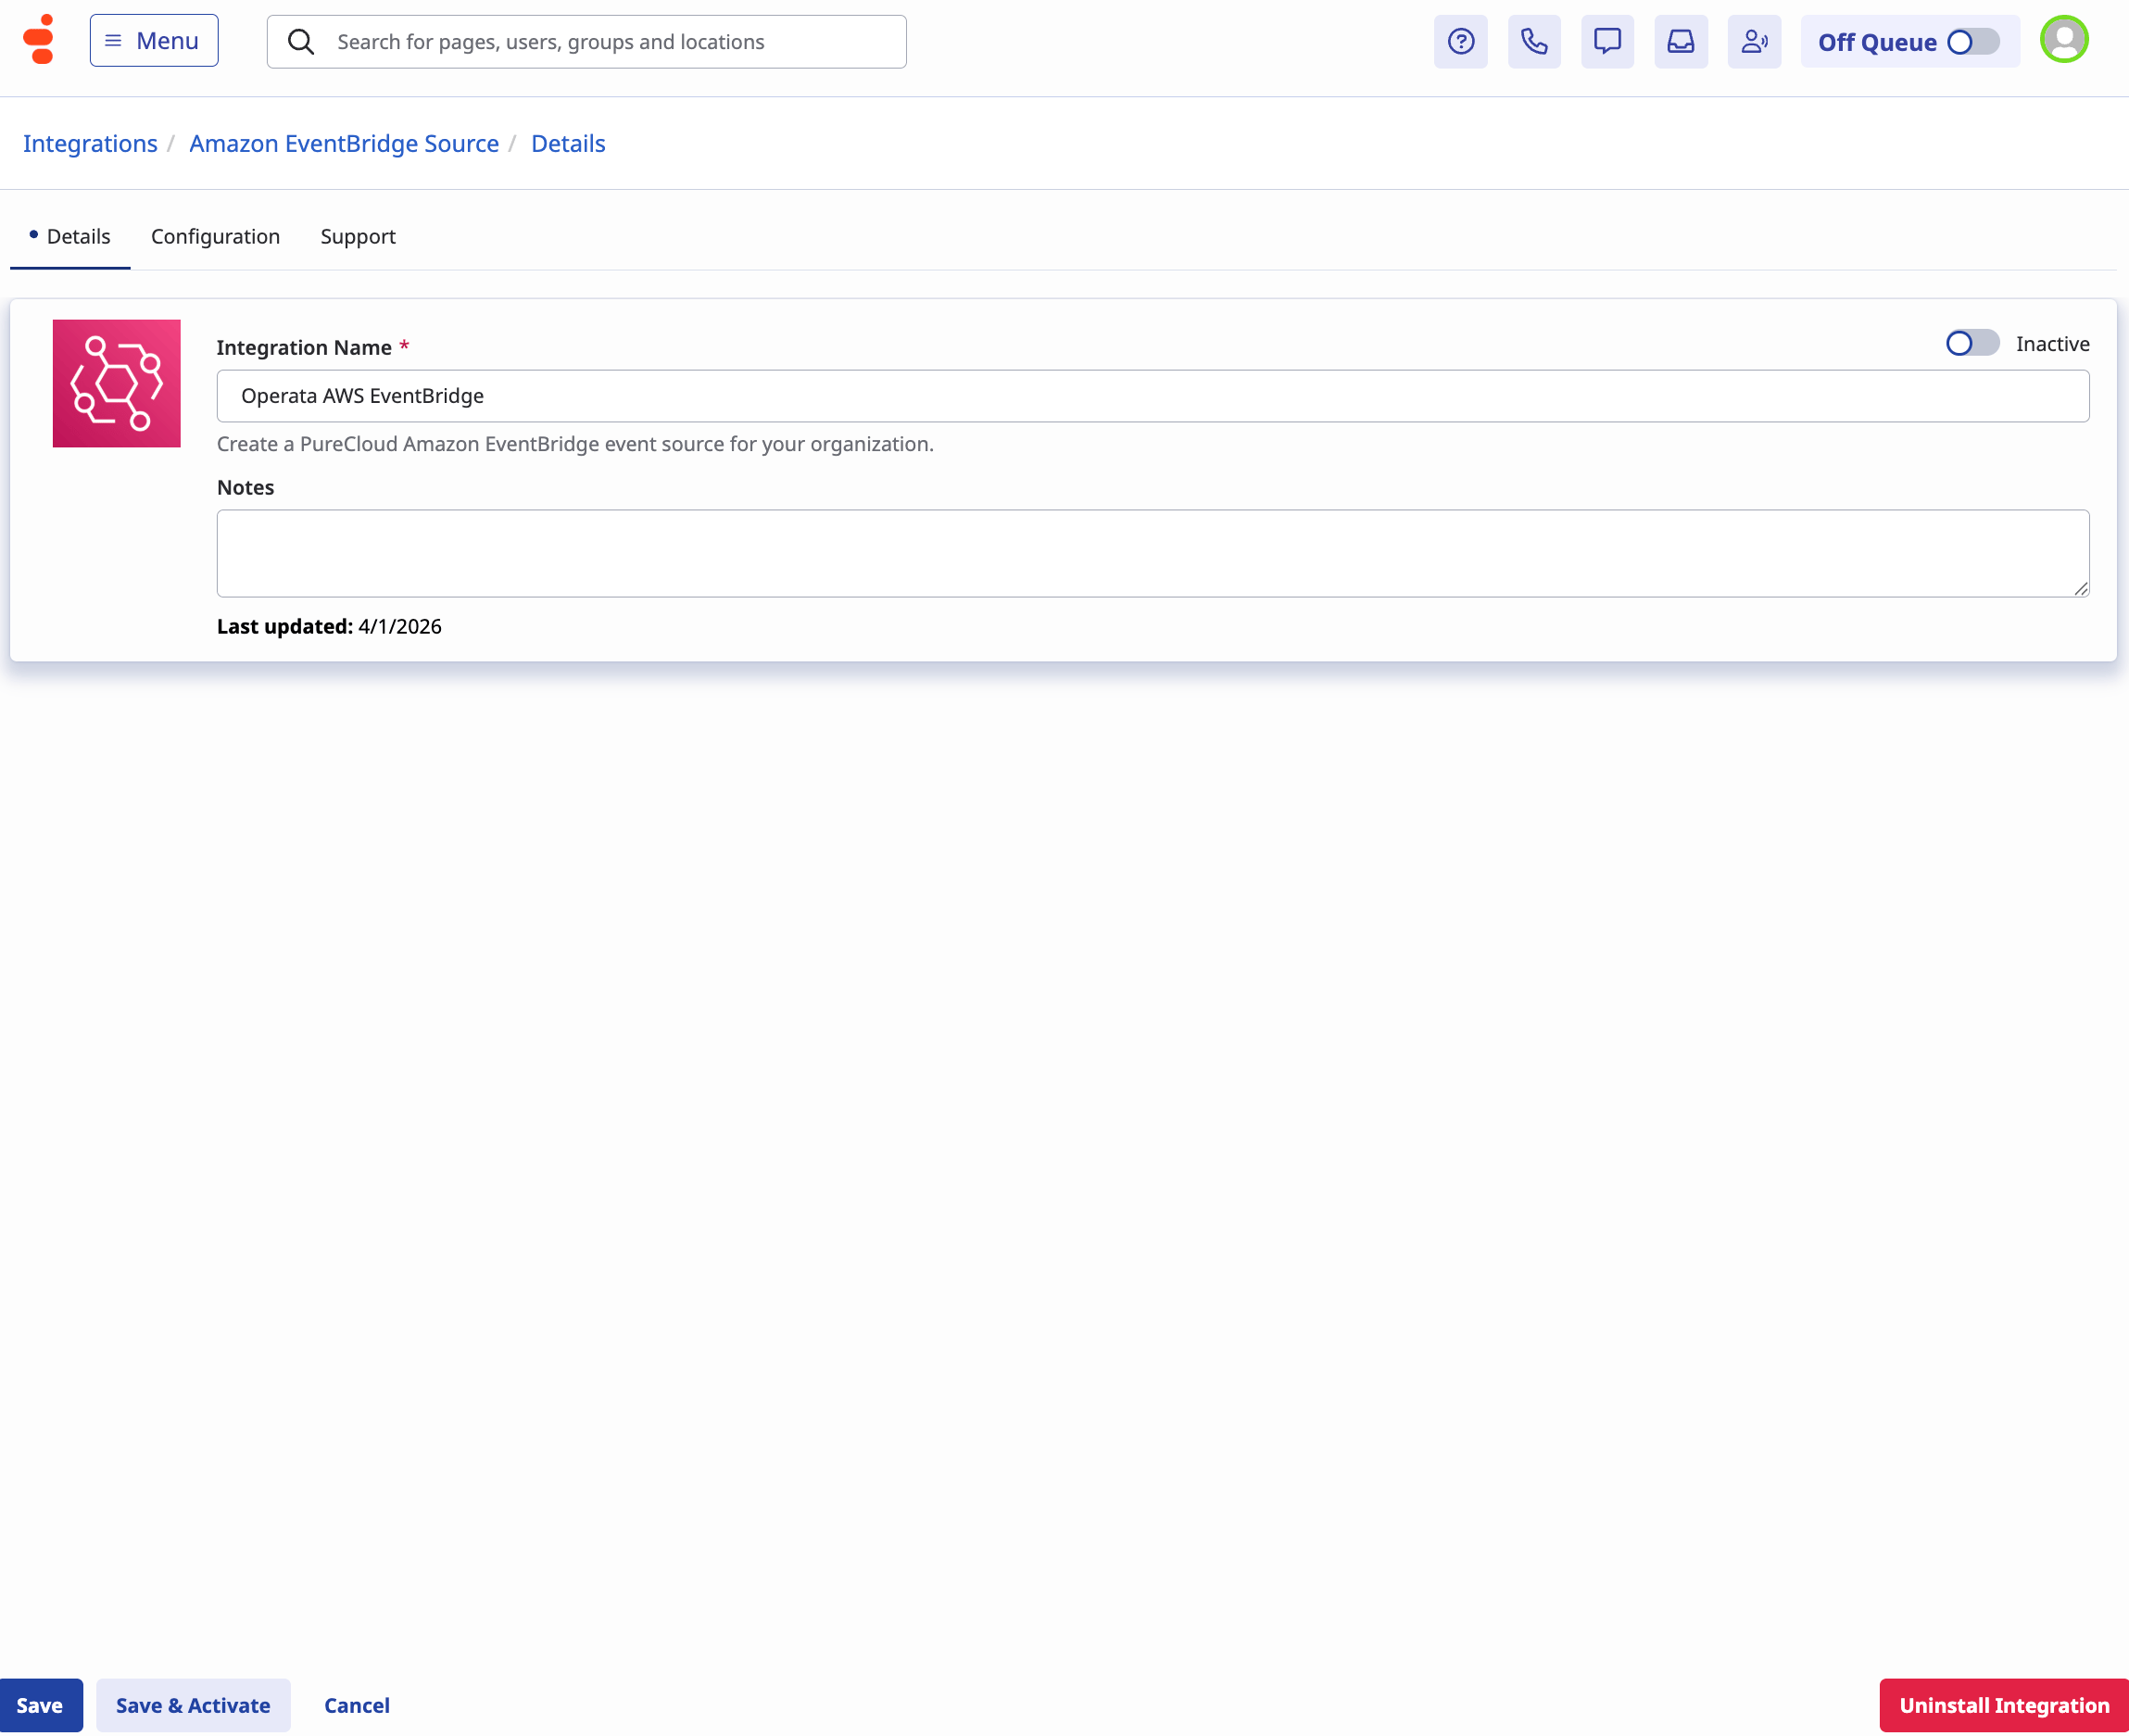
 On the **Details** tab, set:
* **Integration Name:** `Operata AWS EventBridge`
Click **Save**.
On the **Details** tab, set:
* **Integration Name:** `Operata AWS EventBridge`
Click **Save**.
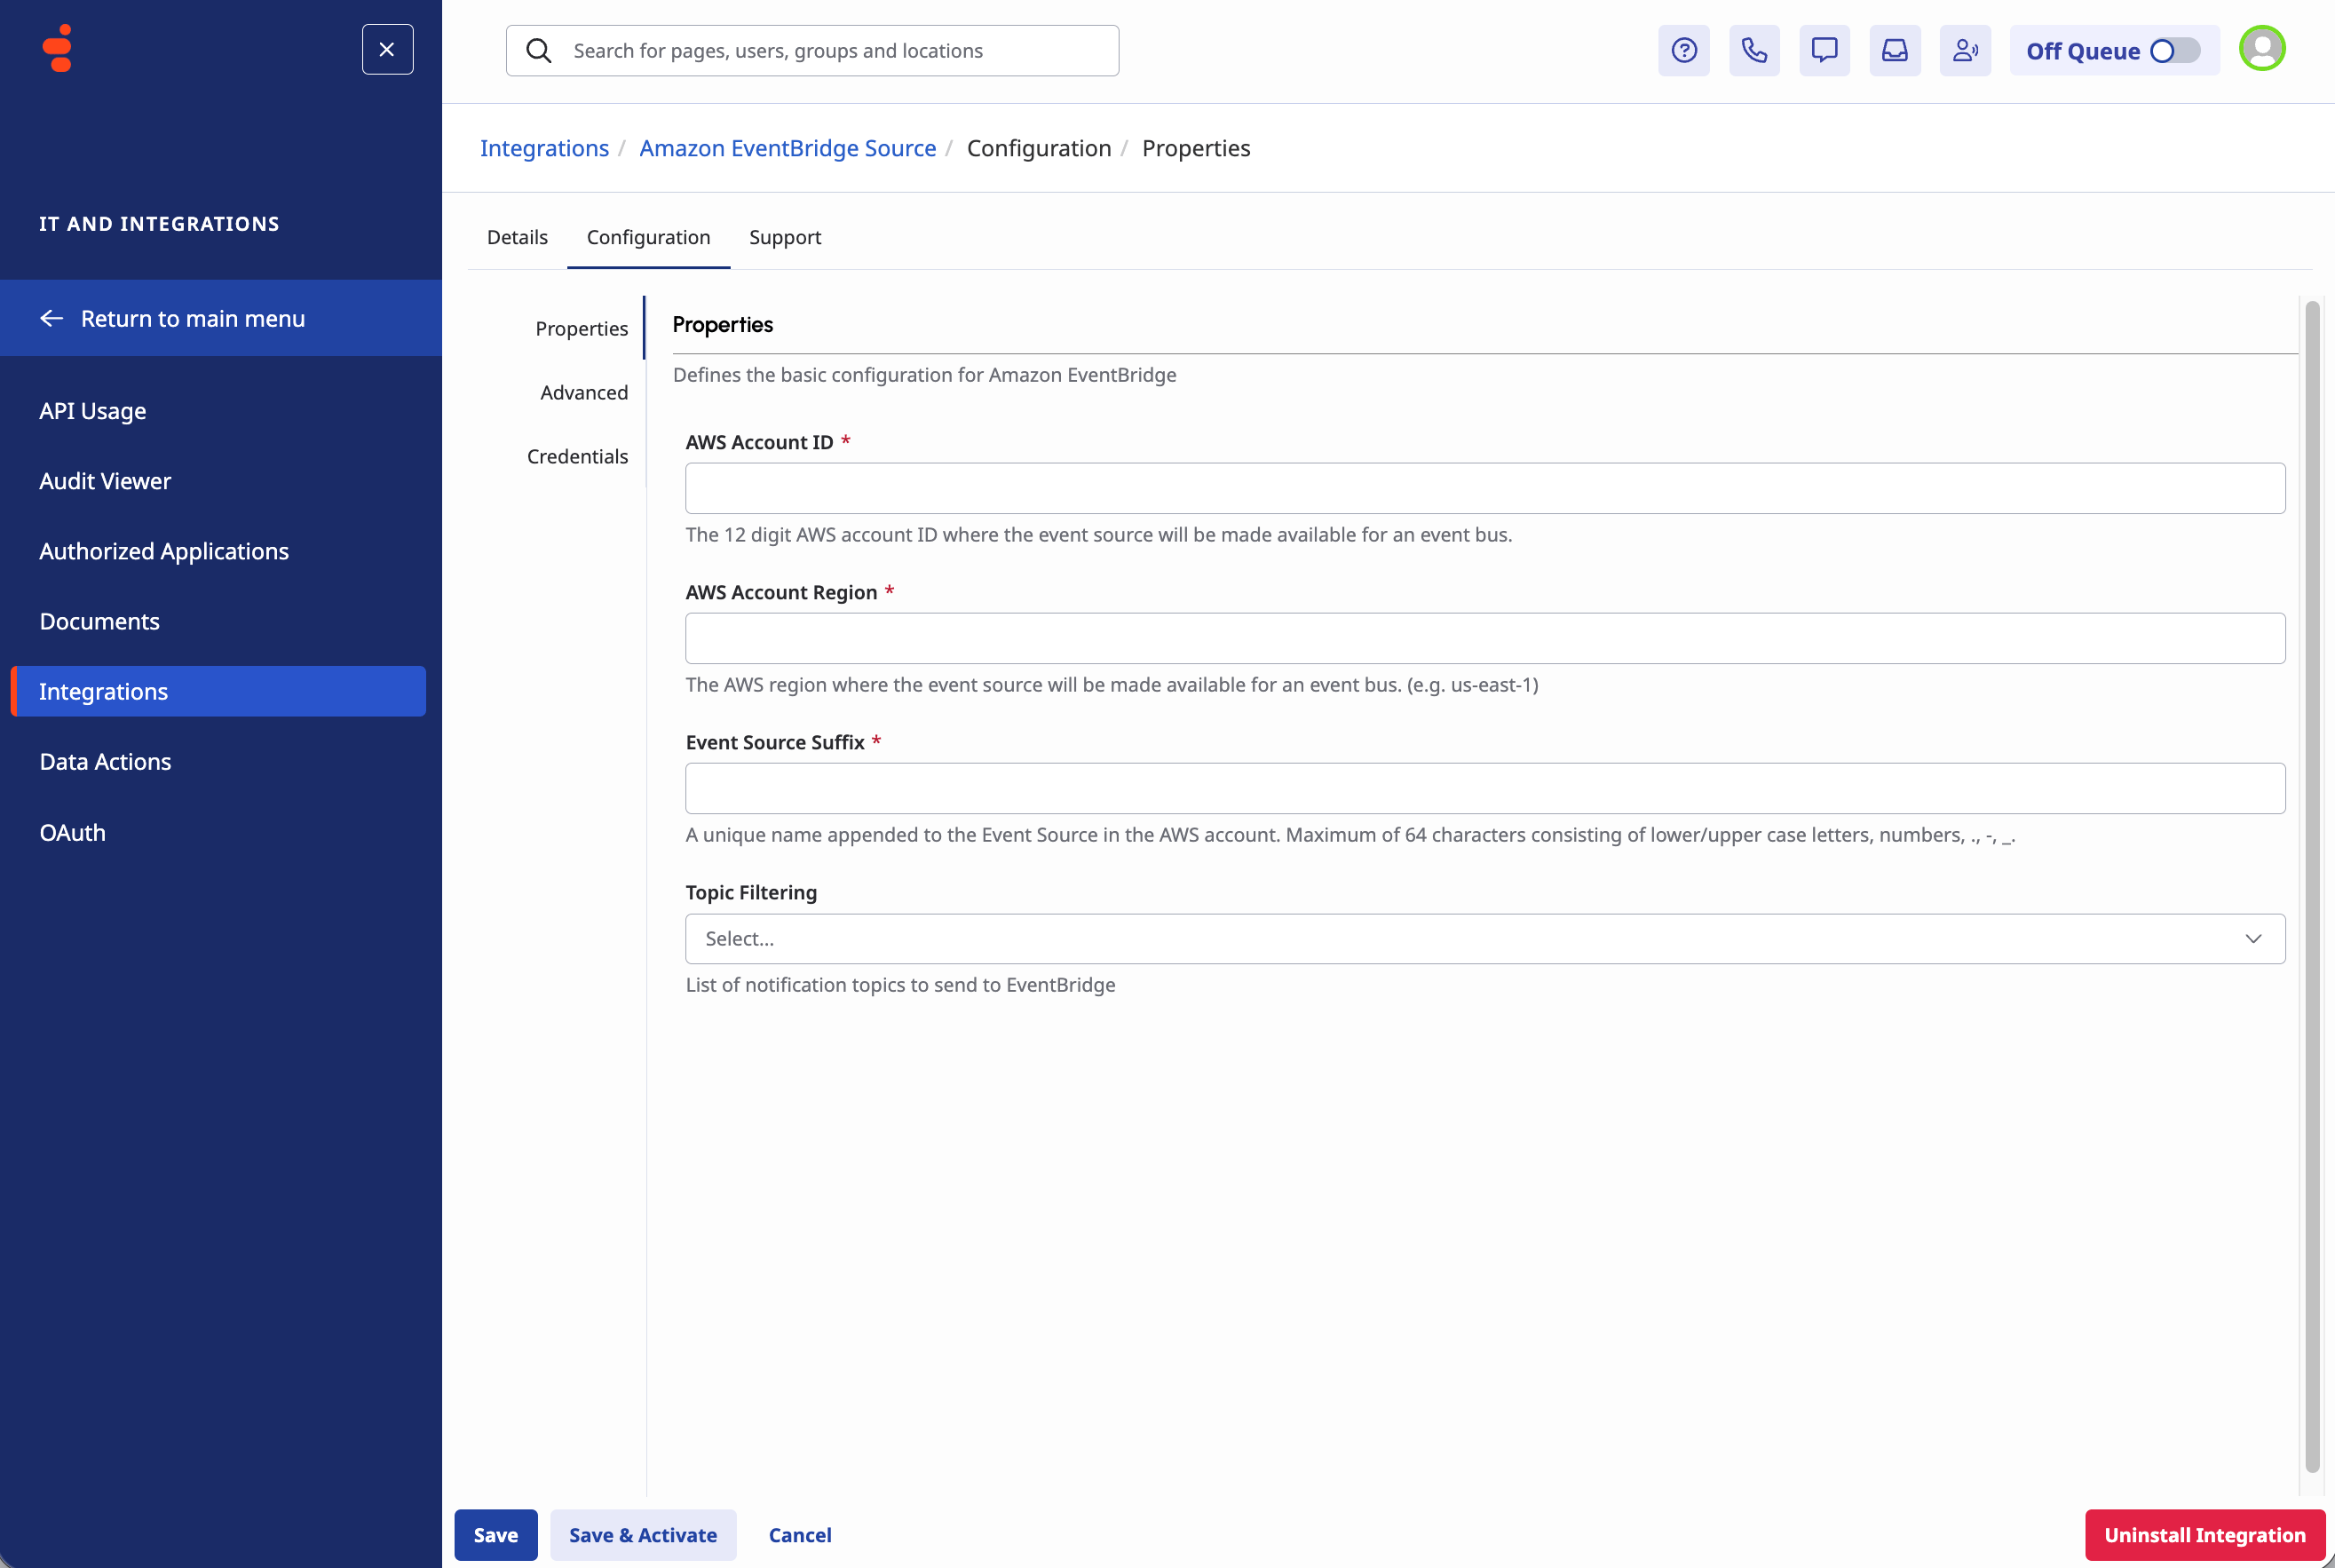
 Switch to the **Configuration** tab and enter:
* **AWS account ID:** `287581919123`
* **AWS account region:** `ap-southeast-2` or `us-east-2`, matching your Operata group region. {/* lint-voice-disable: "us-east-2" is the literal AWS region name, not first person plural. */}
* **Event source suffix:** your Operata Group ID from the Before you start section.
* **Topic filtering:** `v2.detail.events.conversation.{id}.user.end`
Use the AWS account ID and region exactly as shown above — these are Operata's values, not yours. Substituting your own AWS account ID or Genesys-side region breaks the integration; the events never reach Operata.
Switch to the **Configuration** tab and enter:
* **AWS account ID:** `287581919123`
* **AWS account region:** `ap-southeast-2` or `us-east-2`, matching your Operata group region. {/* lint-voice-disable: "us-east-2" is the literal AWS region name, not first person plural. */}
* **Event source suffix:** your Operata Group ID from the Before you start section.
* **Topic filtering:** `v2.detail.events.conversation.{id}.user.end`
Use the AWS account ID and region exactly as shown above — these are Operata's values, not yours. Substituting your own AWS account ID or Genesys-side region breaks the integration; the events never reach Operata.
 Click **Save and Activate**. Genesys Cloud now sends conversation-end events to Operata's AWS account.
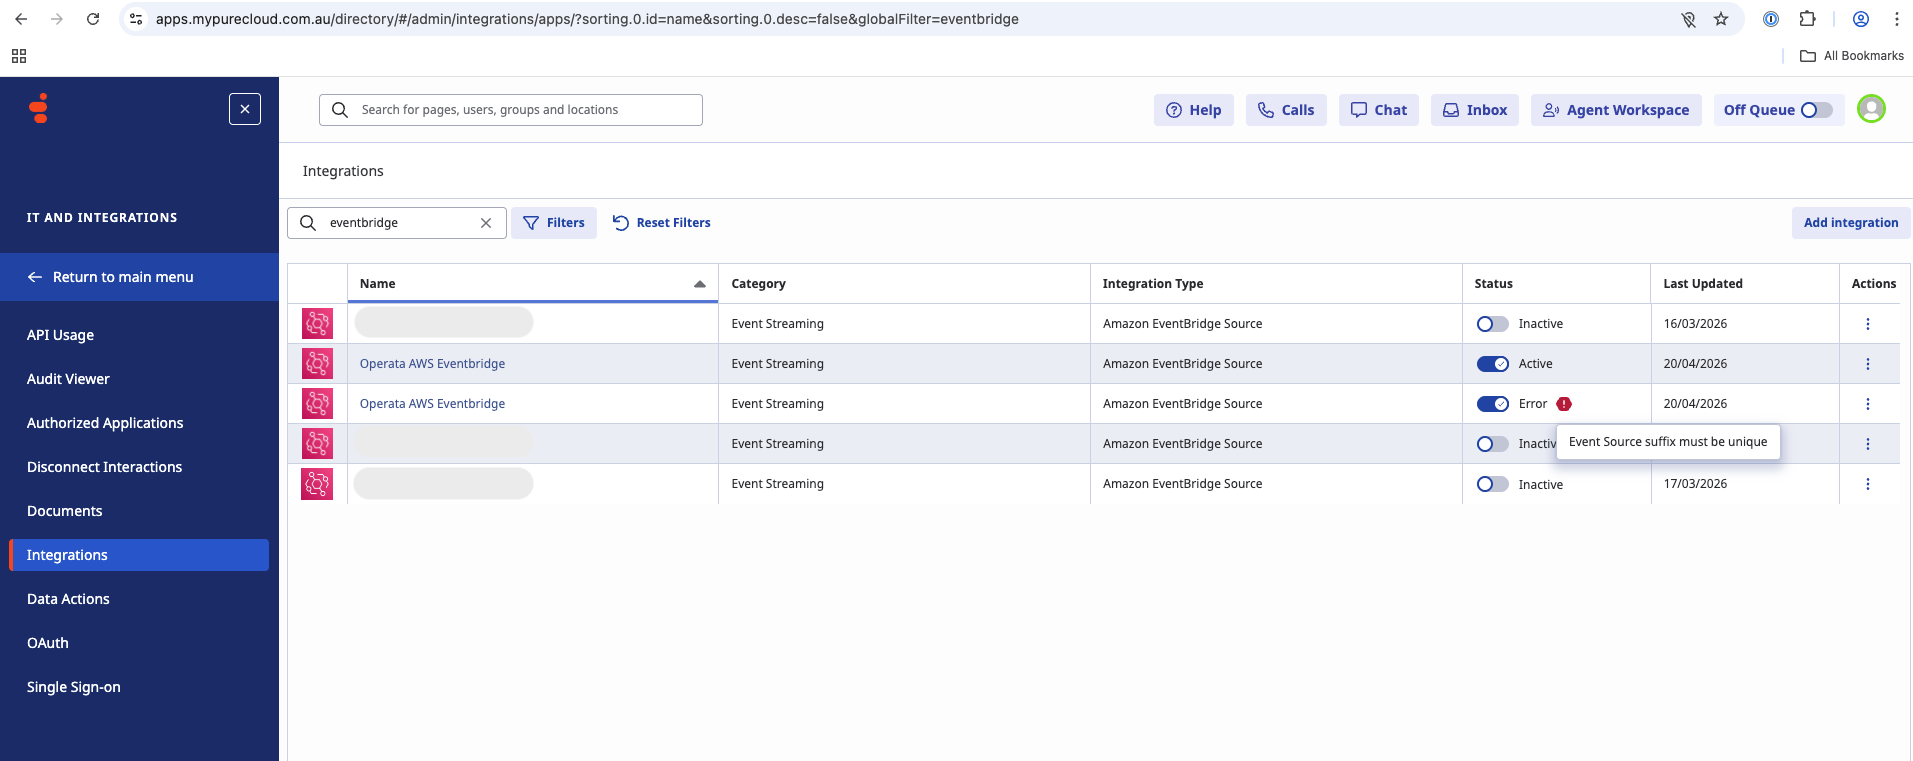
If you create a second event source with the same Operata Group ID, Genesys Cloud returns **Event Source Suffix value must be unique**. Each Operata group supports only one Genesys Cloud Amazon EventBridge integration; reuse the existing source rather than creating a new one.
Click **Save and Activate**. Genesys Cloud now sends conversation-end events to Operata's AWS account.
If you create a second event source with the same Operata Group ID, Genesys Cloud returns **Event Source Suffix value must be unique**. Each Operata group supports only one Genesys Cloud Amazon EventBridge integration; reuse the existing source rather than creating a new one.
 ### 4. Configure Operata
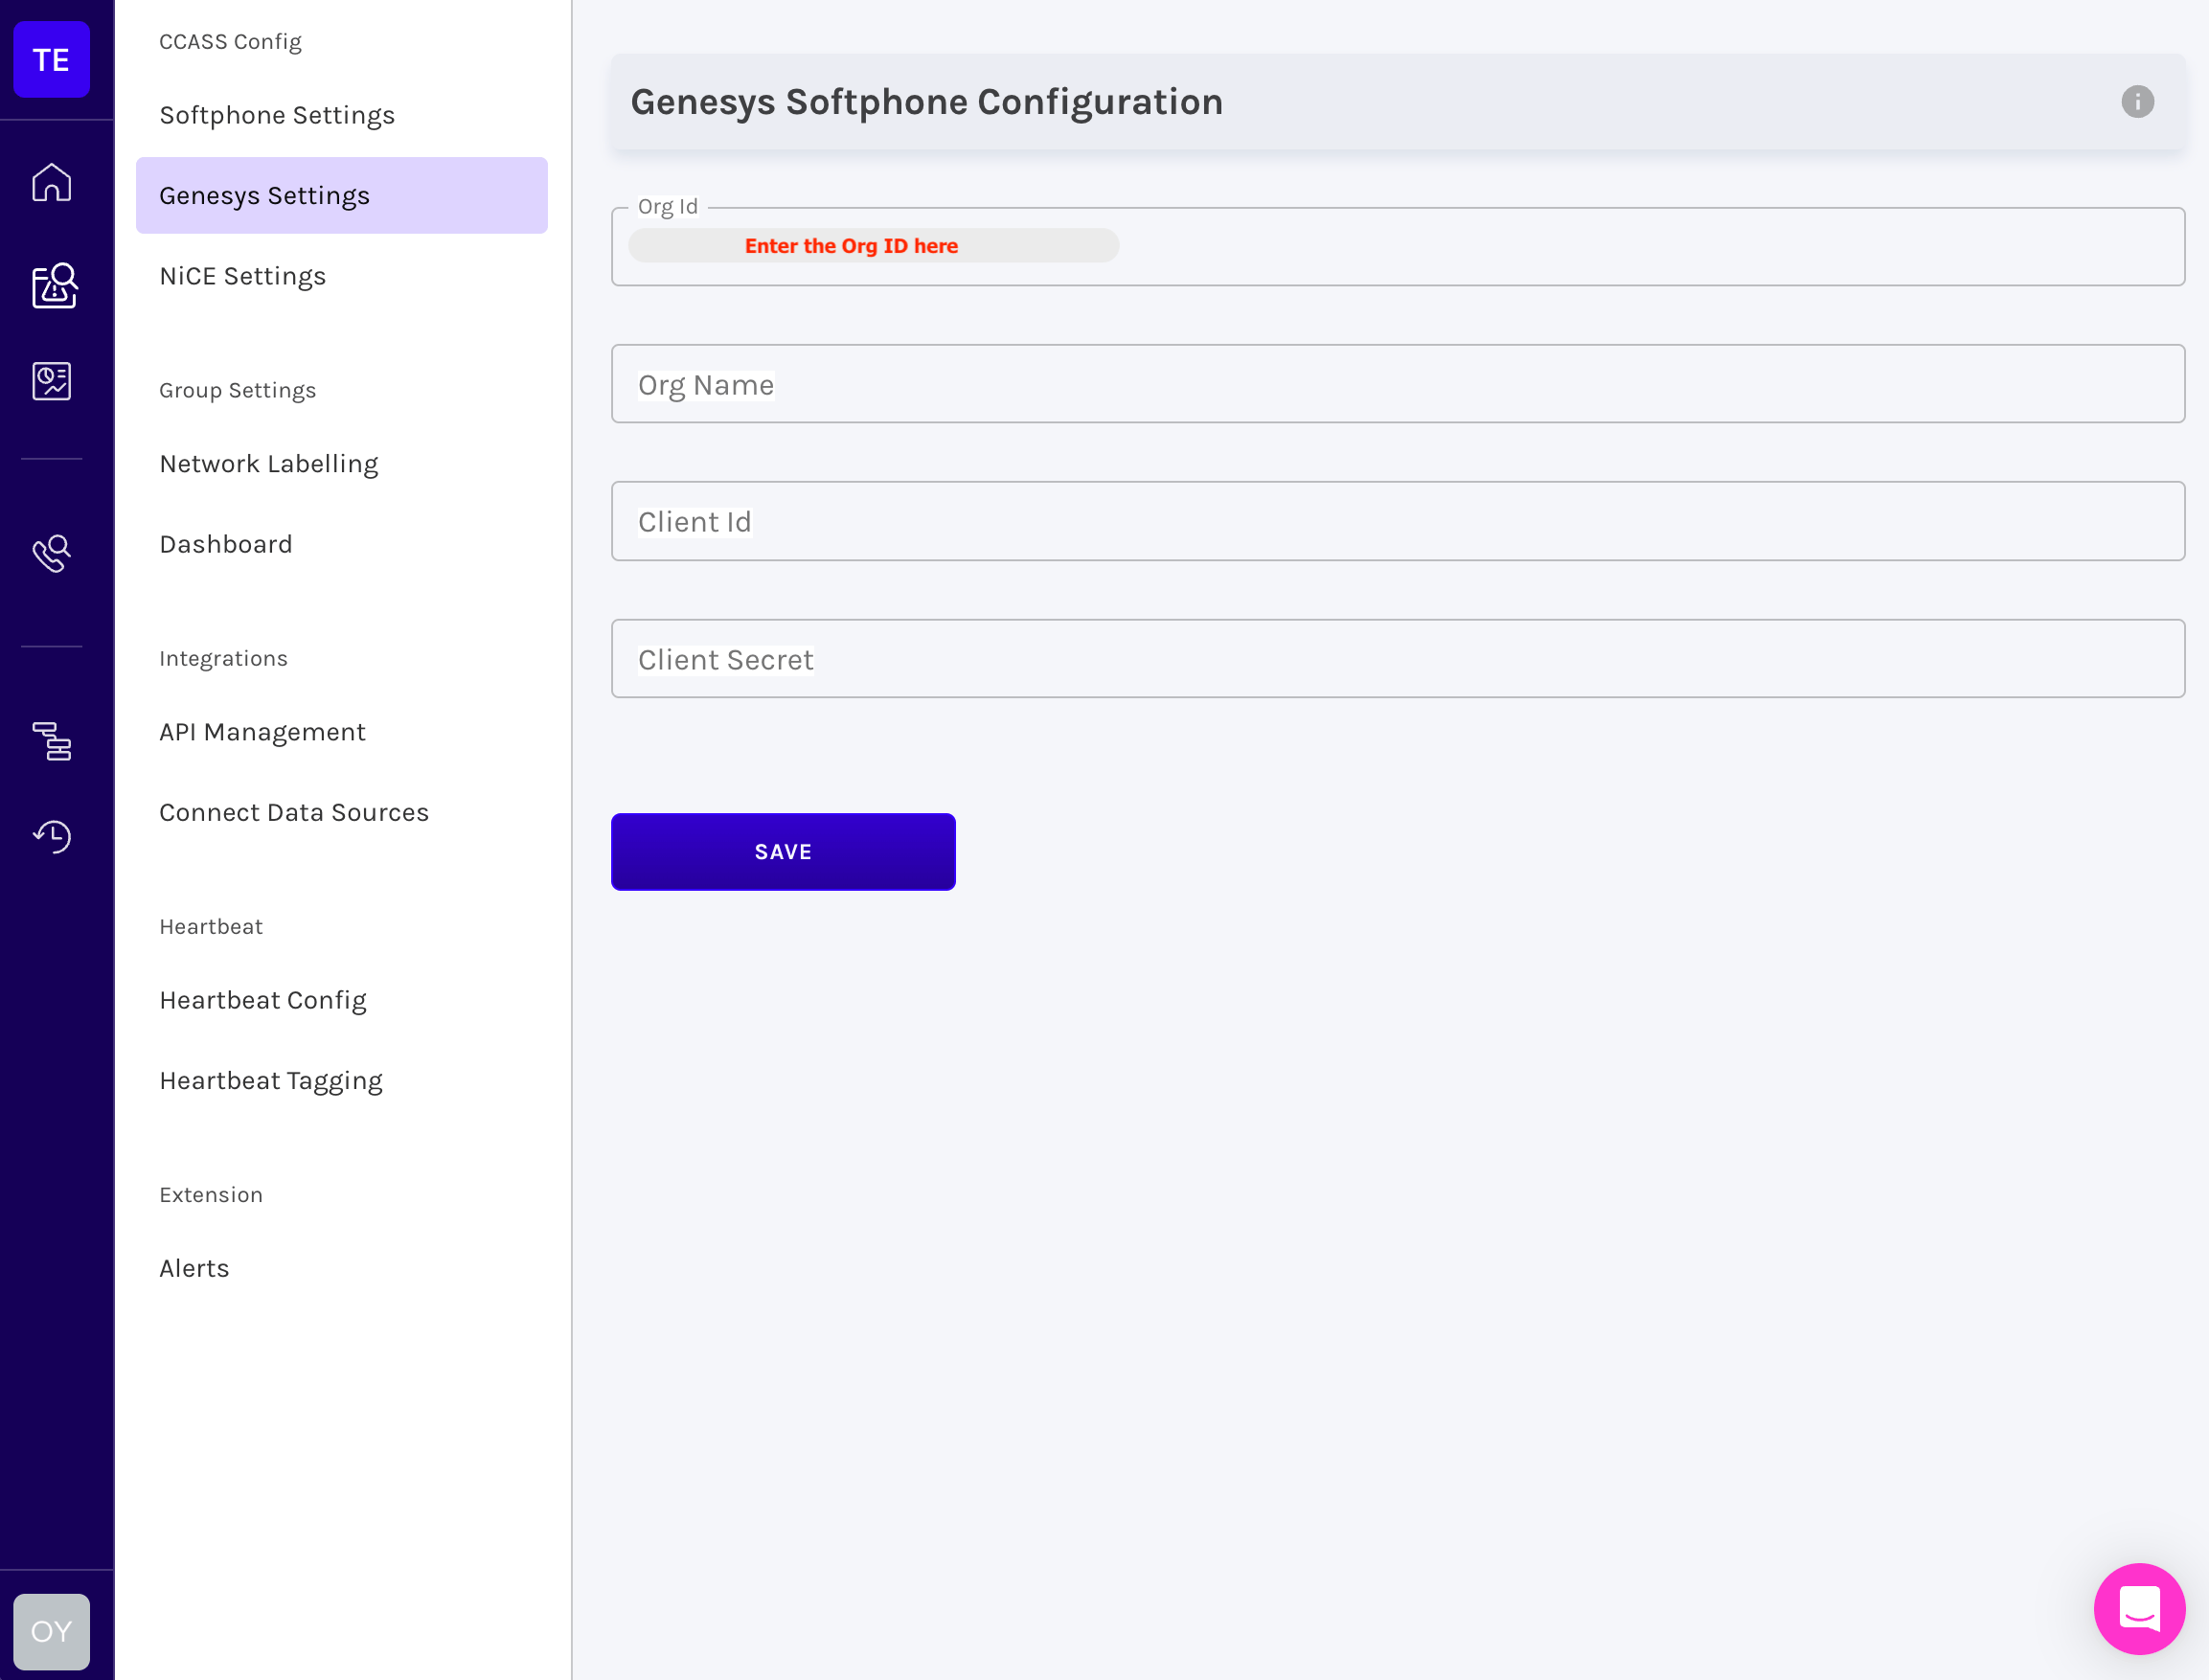
In the Operata console, go to **Group Settings > Genesys Softphone Configuration > Org Id**. Enter the Organization ID you copied in step 1, leave the remaining fields as they are, and click **Save**.
### 4. Configure Operata
In the Operata console, go to **Group Settings > Genesys Softphone Configuration > Org Id**. Enter the Organization ID you copied in step 1, leave the remaining fields as they are, and click **Save**.
 Operata completes the AWS-side configuration (Amazon EventBridge rules, Secrets Manager entry for the OAuth credentials) for you. Open a support ticket with [Operata Support](mailto:support@operata.com) including:
* Organization ID from step 1.
* OAuth Client ID and Client Secret from step 2.
* Genesys Cloud AWS region (so Operata picks the correct API URL for the Fetcher Service).
Operata confirms once the integration is active.
## Verify
Place a test interaction through your Genesys Cloud organization and end the Conversation cleanly. In the Operata console, open **Contacts** and filter to the last 10 minutes. The Conversation appears within five minutes of conversation end, with the `conversationId` matching the Genesys Cloud value.
## Related
* [Configure Genesys Cloud redaction](/docs/genesys-privacy) — Allow or deny fields the Fetcher Service forwards to Operata.
* [Genesys Cloud integration overview](/docs/genesys-overview) — The Amazon EventBridge topics and REST endpoints Operata uses, plus the mandatory observability fields.
* [Concept: Privacy and redaction](/docs/concepts-privacy-and-redaction) — The model the Fetcher Service applies.
* [Genesys data glossary](/docs/resources-data-collection-genesys) — The fields Operata can deliver from Genesys Cloud.
Operata completes the AWS-side configuration (Amazon EventBridge rules, Secrets Manager entry for the OAuth credentials) for you. Open a support ticket with [Operata Support](mailto:support@operata.com) including:
* Organization ID from step 1.
* OAuth Client ID and Client Secret from step 2.
* Genesys Cloud AWS region (so Operata picks the correct API URL for the Fetcher Service).
Operata confirms once the integration is active.
## Verify
Place a test interaction through your Genesys Cloud organization and end the Conversation cleanly. In the Operata console, open **Contacts** and filter to the last 10 minutes. The Conversation appears within five minutes of conversation end, with the `conversationId` matching the Genesys Cloud value.
## Related
* [Configure Genesys Cloud redaction](/docs/genesys-privacy) — Allow or deny fields the Fetcher Service forwards to Operata.
* [Genesys Cloud integration overview](/docs/genesys-overview) — The Amazon EventBridge topics and REST endpoints Operata uses, plus the mandatory observability fields.
* [Concept: Privacy and redaction](/docs/concepts-privacy-and-redaction) — The model the Fetcher Service applies.
* [Genesys data glossary](/docs/resources-data-collection-genesys) — The fields Operata can deliver from Genesys Cloud.